This guide is really, really long, and this is just a shorter version of the original. The additional URL provided gives you the full version of this guide that you can read in Google Docs. Click on "More Information" next to this thread to watch the full guide.
You’ve probably heard of Vertex Slopes (also known as VSlopes), the harder version of slopes in Zone Builder. This guide will teach you how to use them and master them as a very flexible and alternative tool to improve your mapmaking.
It is assumed you have already been acquainted with Zone Builder (https://wiki.srb2.org/wiki/Zone_Builder_tutorial/Getting_started) and with the slope tutorial on the SRB2 Wiki (https://wiki.srb2.org/wiki/Slope). But because the wiki article is concise and doesn’t have a lot of pictures, I will try to do my best to explain how it works.
This tutorial explains how to do a vertex slope, chain vertex slopes together, and more. This WILL NOT COVER dynamic slopes (like the moving slopes in Kodachrome Void or the moving props in Northern District).
Why Vertex Slopes?
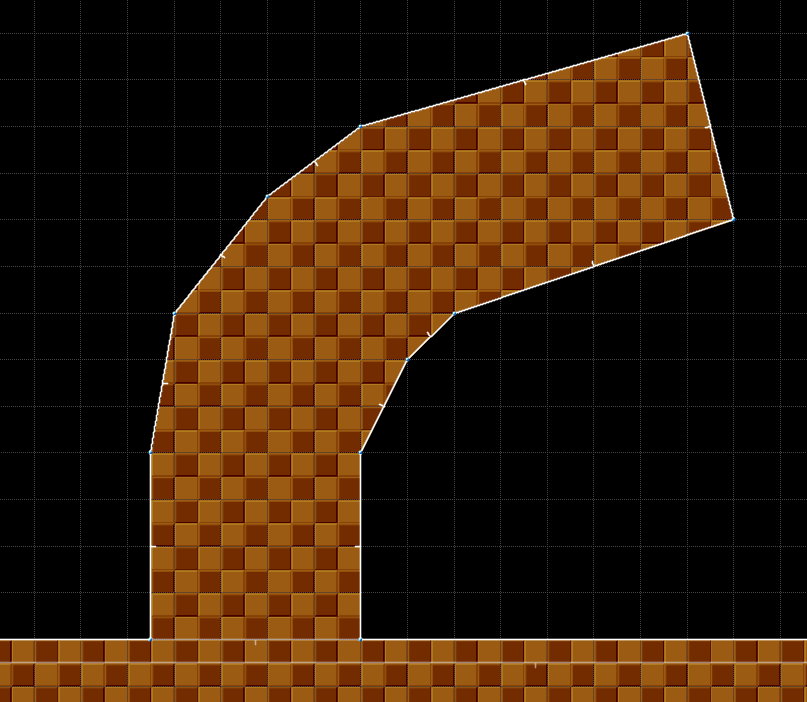
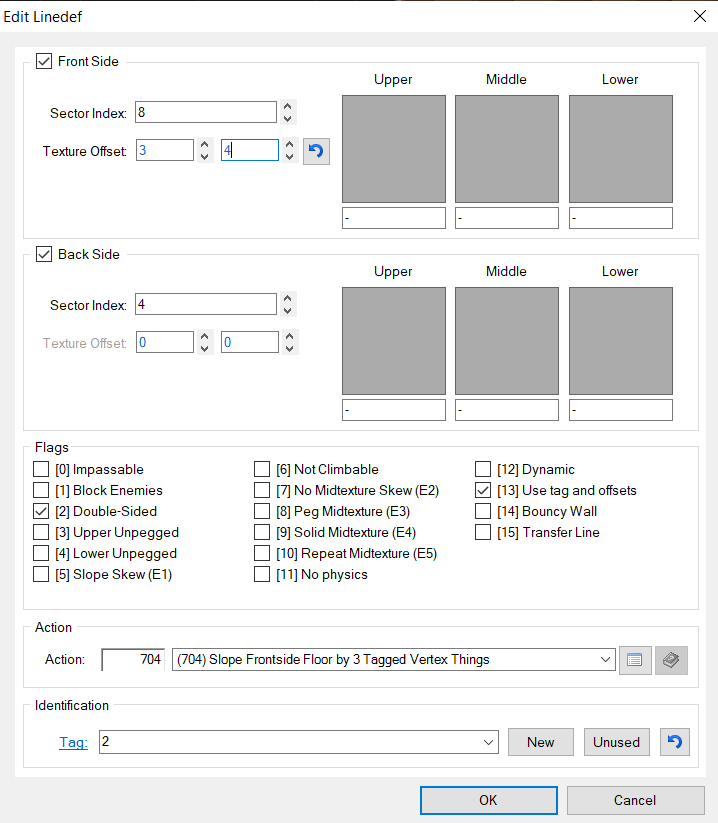
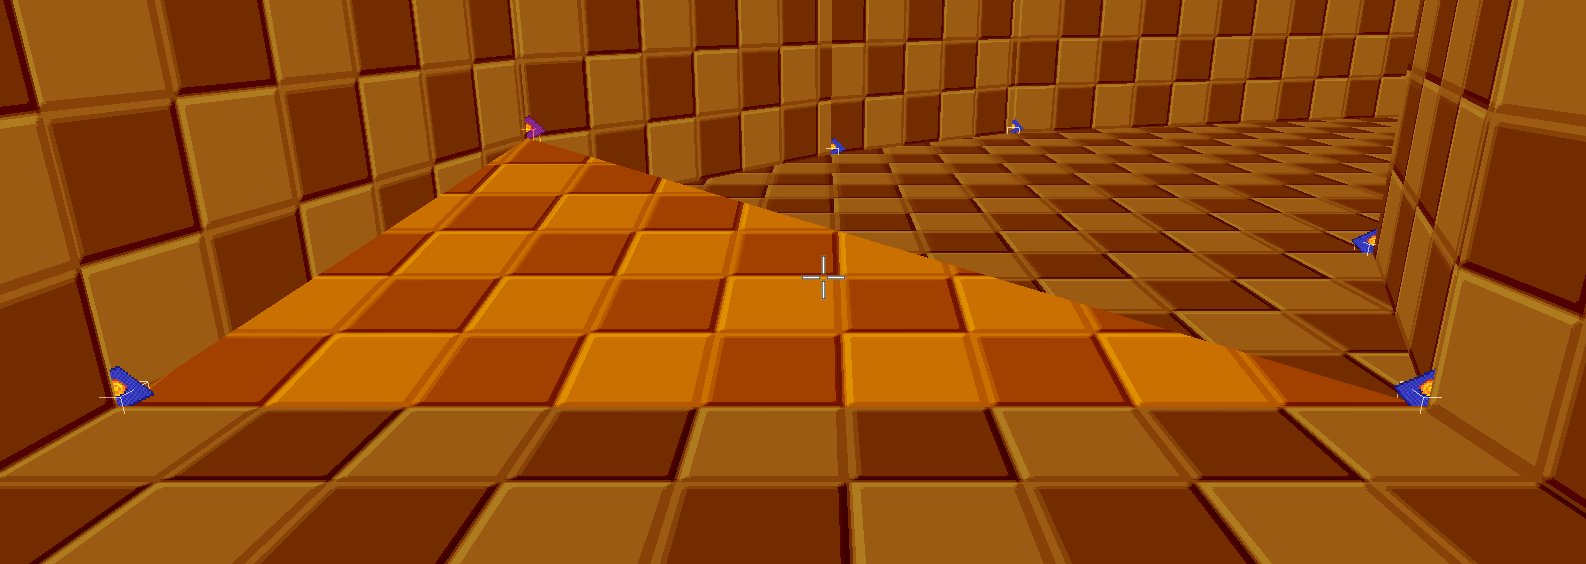
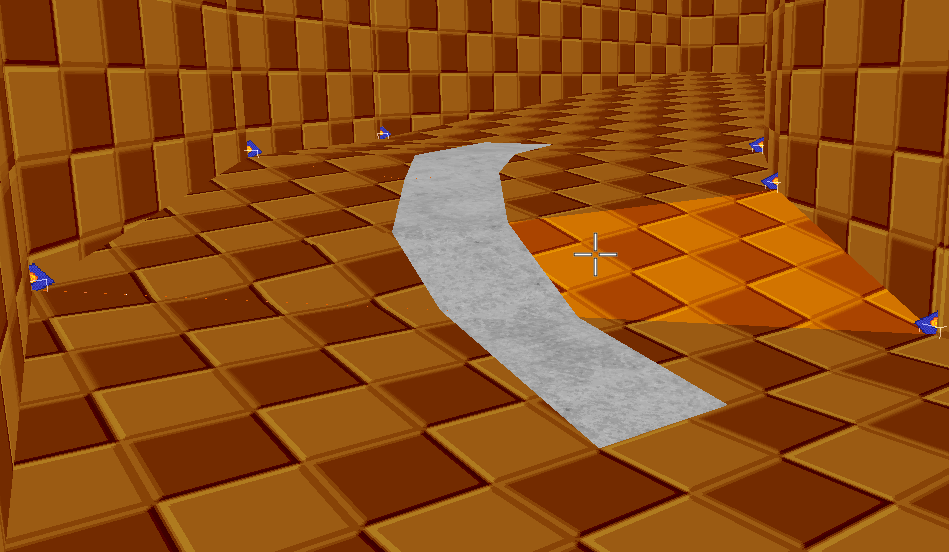
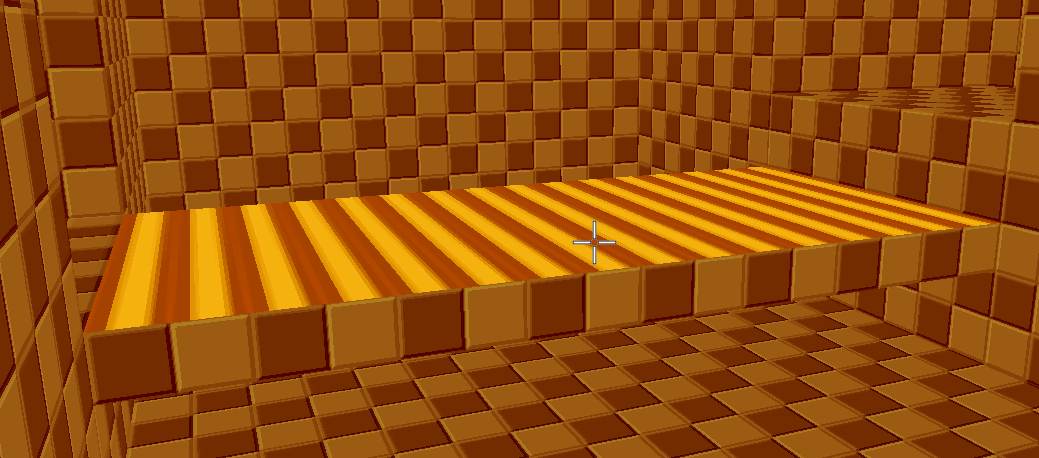
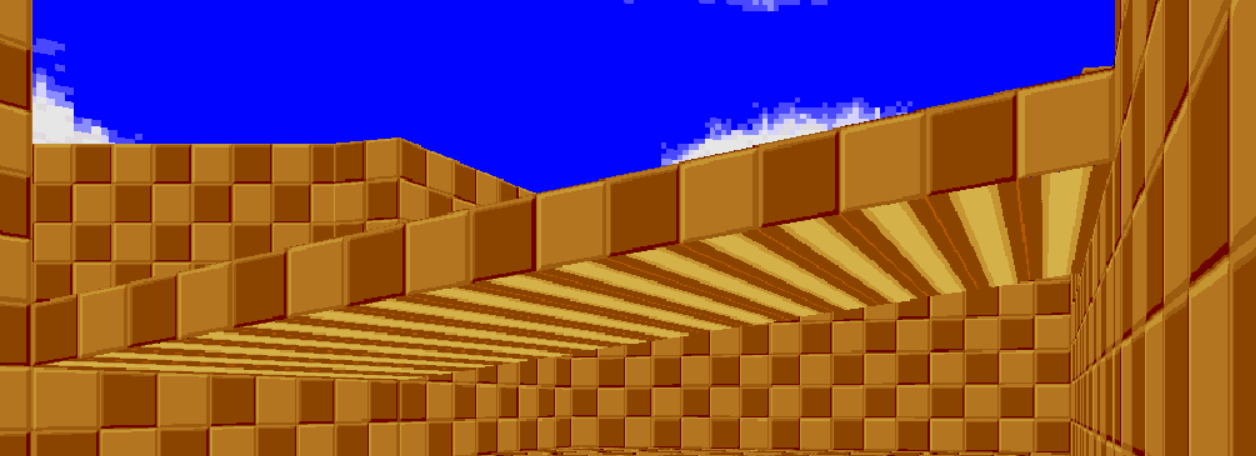
First of all, remember that you don’t have to use Vertex Slopes all the time. Sector slopes are always okay, and will work either by using triangles and some precise raising and lowering of sectors, or by making both linedefs parallel to each other for more complex sectors. However, what vertex slopes allow you to do are things like this:
It gives you a degree of freedom that you usually can’t get with sector slopes. When you start making maps, you will be tempted to chain turns and slopes together. One of the most common constructs is the upwards slope followed by a right-angle (90°) turn. However, doing something like this causes your turn to be hardly readable, and depending on how steep your slope is, it could become an item trap itself, as the terrain would be too wonky to see what's in front of you. With vertex slopes you can make your turns themselves sloped too, which makes them much more accessible and easier to drive on. It's basically a show of good track design. Vslopes are also easier to modify since they depend on Things rather than sector heights, so you don't depend on parallel linedefs as much. Finally, they are the preferred way to slope FOFs.
With that out of the way, let’s go! Making vertex slopes is easier than you think - you just need to take a few things into account.
The easiest of vertex slopes
Introduction
Let’s start with a triangle. It can be of any size you want.

What we’re going to do is to raise two out of three vertices of this triangle (the top and right ones), and keep the one on the left at ground level. You can lift one vertex with sector slopes and the Linedef Special 700 (or 710), but NOT TWO OR ALL THREE. Because of that, we are going to do it with vertex slopes. To do this, we will use the Thing known as Slope Vertex. (THING 750) [Plural: Slope Vertices]
Let’s start with a triangle. It can be of any size you want.
What we’re going to do is to raise two out of three vertices of this triangle (the top and right ones), and keep the one on the left at ground level. You can lift one vertex with sector slopes and the Linedef Special 700 (or 710), but NOT TWO OR ALL THREE. Because of that, we are going to do it with vertex slopes. To do this, we will use the Thing known as Slope Vertex. (THING 750) [Plural: Slope Vertices]
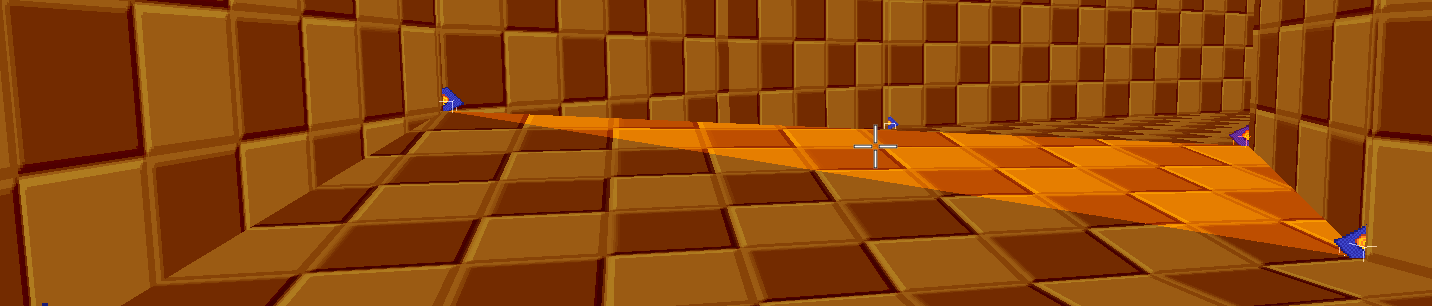
Start by grabbing three Slope Vertices and place them close to each Vertex of the triangle, BUT NOT right on top of them, or on top of any linedef. This can cause bugs when there are floors with different heights. Notice in the image below how they aren’t right on top of the points. The closer they are, though, the more accurate it will be.
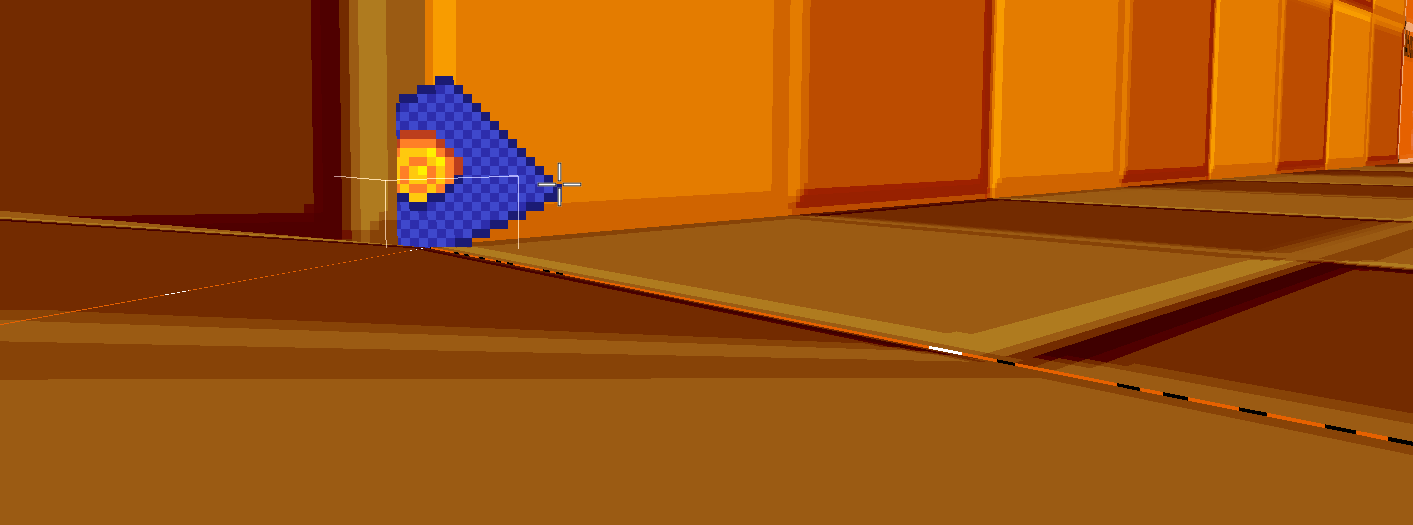
Now let’s mark the lower linedef with the special 704 (Slope Frontside Floor by 3 Tagged Vertex Things), and give it a Tag (in this case, 1).

Then we will also give all three slope vertices the tag 1.

After that’s done, go to Visual Mode (W) and check it out. Grab one (or more, if you want) of the slope vertices and wiggle it up and down using the mouse wheel. If the slope moves along with you, you did it right! If it doesn’t, try going in and out of Visual Mode to see if anything changes. If it still doesn’t work, you have done something wrong.
Now let’s mark the lower linedef with the special 704 (Slope Frontside Floor by 3 Tagged Vertex Things), and give it a Tag (in this case, 1).
Then we will also give all three slope vertices the tag 1.
After that’s done, go to Visual Mode (W) and check it out. Grab one (or more, if you want) of the slope vertices and wiggle it up and down using the mouse wheel. If the slope moves along with you, you did it right! If it doesn’t, try going in and out of Visual Mode to see if anything changes. If it still doesn’t work, you have done something wrong.
Congrats! Your very own first vertex slope has been done. From here, it works just like a sector slope - you can turn the physics off, add textures to the raised sides, etc.
Tips and warnings
There are some things you need to take into consideration when creating slopes with three vertices:
Tips and warnings
There are some things you need to take into consideration when creating slopes with three vertices:
- You can only use three Vertex Things to create your slope each time, and those Things cannot be collinear! (AKA, if your three Vertex Things stand exactly on the same line [collinear], your game will freak out / crash.)
- Despite only being able to use three Things per slope, the shape of your sector can be anything, not just a triangle.
- Single vertex slopes like these are perfect for simple fixes and slopes whose sectors are not attached to anything of the same height (like, a pillar with a sloped floor that's isolated from the rest of the surrounding sectors).
- Vertex Things can be placed OUTSIDE of the sector you're sloping, but their heights will then depend on the floor heights of where your Things are. This is why placing Vertex Things right on top of linedefs or vertices is risky. The game won't know which sector height to pick and the slope may vary out of the blue!
- You cannot place a Vertex Thing below the sector floor it's in. This is independent from the sector the Vertex Thing is sloping.
The Slope Chain
The Slope Chain
Creating the turn
Creating the turn
Now you know how to make VSlopes. But how does it work when sloping a turn made out of many, many triangles, close to each other?
Well, let’s make a turn!
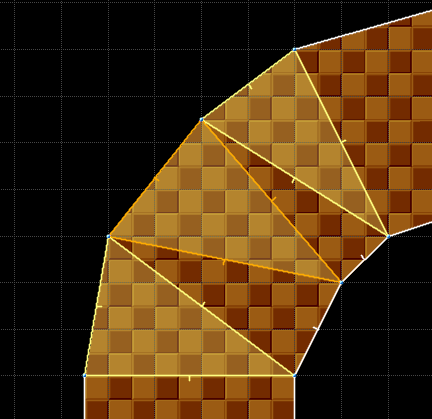
Now, to be able to slope this turn with slope vertices, you need to turn this into triangles. Use a zigzag pattern for this:
Make sure to separate all sectors using Make Sectors Mode! (M) So when you highlight, you only see one sector at a time.
Now, the first step is to make sure all linedefs point in the same direction, which is in the direction of your track. Press F to flip linedefs once selected. It’s very important you do this now to avoid problems later, and it also allows you to pull a quicker way to do this when you got the hang of it.
(NOTE: Pressing F to flip the linedef will also flip textures and offset values. So if you typed some values first and then pressed F, those will flip too. You better get those right or you will have to rewrite them on the other side!)
Adding the Things
Adding the Things
Now, add Slope Vertices at each point, following the zig zag pattern. Doing that now will save you problems later. You will want to start where the zigzag starts and go on from there. Remember not to place any Slope Vertices right on top of points or linedefs. It doesn’t matter where else you put it, though, as long as it’s close. It can be in one sector or the other, just not out of bounds.
Now we’re going to select all of them by clicking on each Slope Vertex always following the zigzag. We see that all of them have Tag 1 (since we have used it before).
Instead, we are going to type this, and then hit OK:
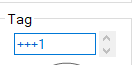
After hitting OK, you will notice that all of your Slope Vertices have increasing tags! We just used a command that makes all of our Slope Vertices go (in my case) from 2 to 8, in order, following the zigzag. (If this step is too complicated, you can always set up the tags manually, one by one.) For example, the triangle you see below is now made out of Slope Vertices with tags 2, 3, and 4. We are going to focus on that one for now, and make a slope here.

We make the slope in a similar fashion as the first example. Use Linedef special 704, and use Tag 2 in this case. The difference is that this time, we will tick on Box [13] “Use Tag and Offsets”. (Also known as “No Knuckles”)
We are not done yet. By ticking [13], we are asking the game to search for Slope Vertices with three different tags (in this case, we want Tags 2, 3, and 4) We already have Tag 2. How can we tell the game to look for Tags 3 and 4? We type them HERE:
(NOTE: If you are using Special 714 instead of 704, use the BACK SIDE instead!)
We have now used tags 2, 3, and 4 in one linedef. REMEMBER THIS PATTERN.
Now you can go to Visual Mode and test your slope by wiggling!
It works! Now let’s keep going.
Setting the Slope
Setting the Slope
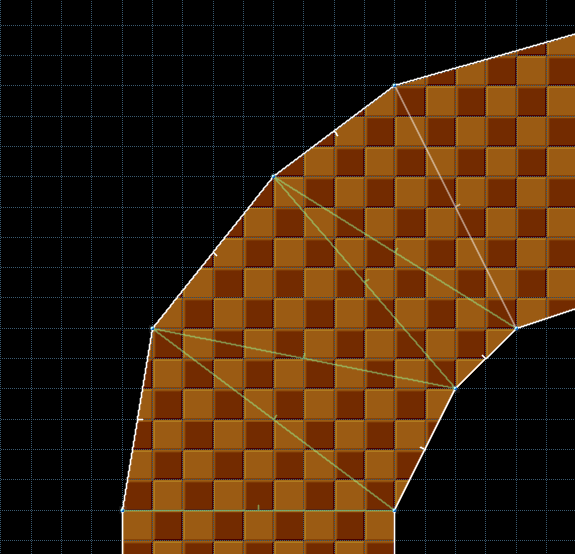
Your turn now looks like this. You will see that if your linedef has a Special, it is green. If it doesn’t, it’s white. Let’s grab the next linedef:

For this next linedef, we just do… The same as before! This triangle is touching the Slope Vertices tagged 3, 4, and 5. See a pattern here? We can do the exact same setup as with the last slope. Now, the tag will be 3, and the other two numbers will be 4 and 5. Easy!
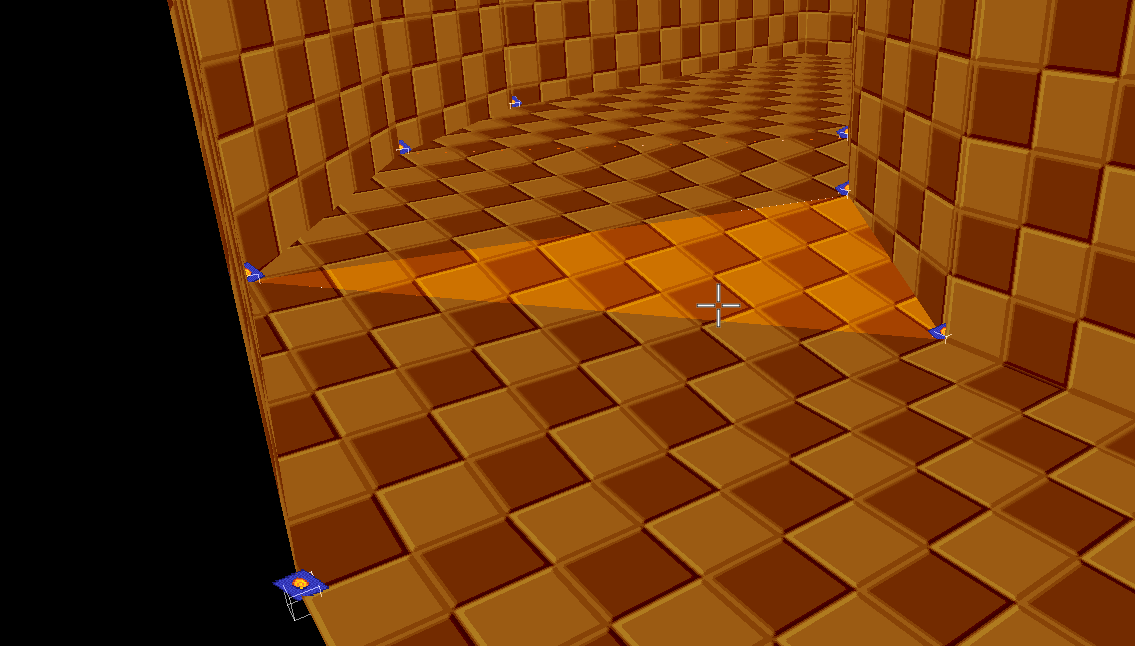
By doing this, and ticking where it’s necessary, we have created another slope that builds up from the last one almost seamlessly!
It’s so seamless you wouldn’t even think it’s two sectors!
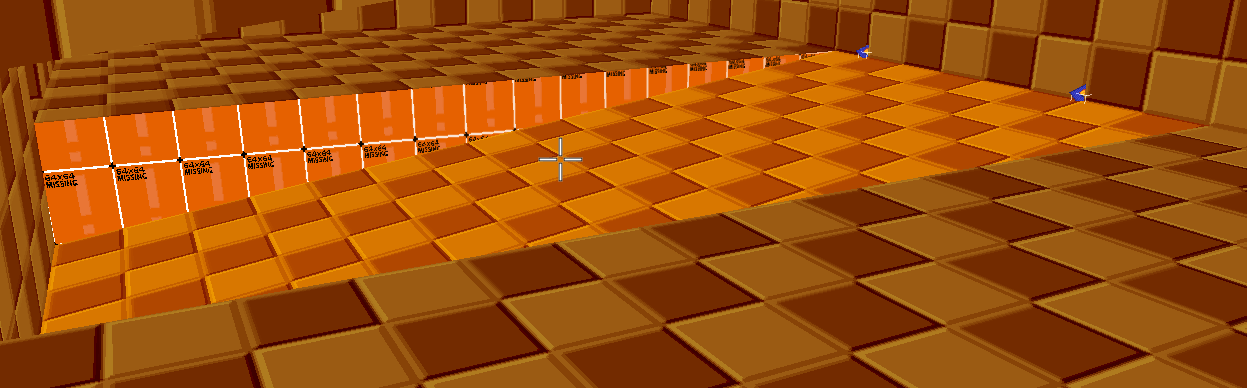
(NOTE: Some microspacing issues may occur, shown in the shape of missing textures where things should go smoothly. This is the result of not putting the slope vertices right on the points, but it’s a necessary evil to avoid bugs. In gameplay you really don’t notice any of these anyway.)
For this next linedef, we just do… The same as before! This triangle is touching the Slope Vertices tagged 3, 4, and 5. See a pattern here? We can do the exact same setup as with the last slope. Now, the tag will be 3, and the other two numbers will be 4 and 5. Easy!
By doing this, and ticking where it’s necessary, we have created another slope that builds up from the last one almost seamlessly!
It’s so seamless you wouldn’t even think it’s two sectors!
(NOTE: Some microspacing issues may occur, shown in the shape of missing textures where things should go smoothly. This is the result of not putting the slope vertices right on the points, but it’s a necessary evil to avoid bugs. In gameplay you really don’t notice any of these anyway.)
Now you are ready to keep going. Your first slope had the pattern 2->3->4. Your second slope had the pattern 3->4->5. For the next triangle, thus, you will need the pattern 4->5->6 (with 4 as your tag and 5 & 6 as your texture offsets). Keep adding one to each sector, staying with the exact same structure! Now you can keep going until all slopes are done.
Eventually…
(We don’t have to do anything with that last linedef. After all, there is no triangle “coming from” there anyway. Adding the slope special to that last linedef by accident will cause your game not to load.)
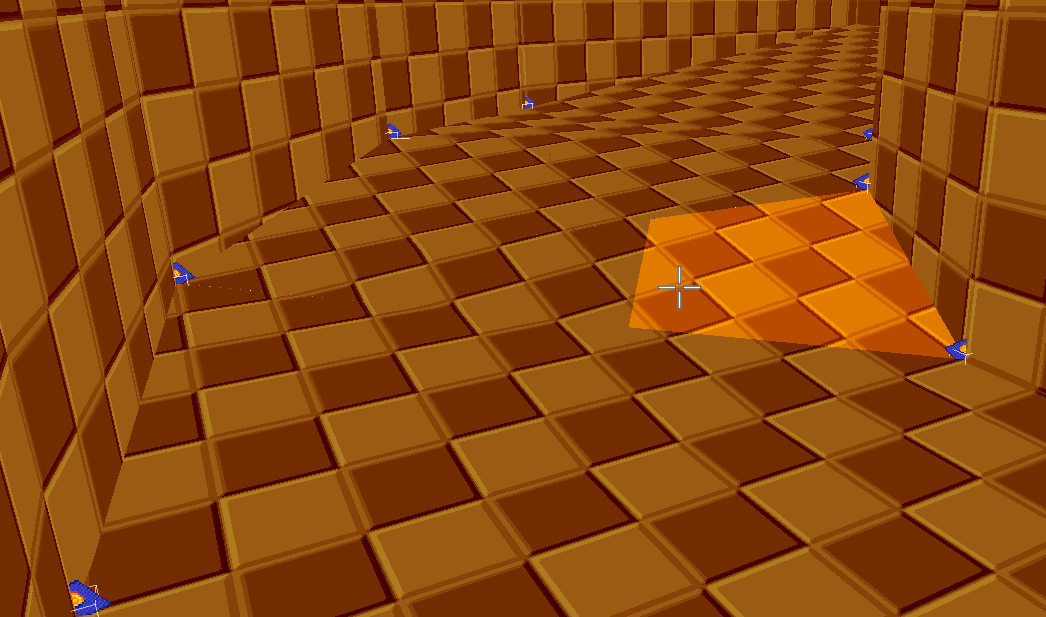
Let’s see the results!
There are very few things more satisfying in life than being able to grab each one of these vertices and seeing how the slope bends to your will. Now you are ready to create chains of slope vertices, making smooth turns! In really tight turns, it’s likely you have a rather bumpy road, but there’s nothing you can really do about it, except moderating the heights of your slope vertices or adding more triangles. If the bumps cause you to go flying off, tick “No Sonic / No Physics” on your slope linedefs to prevent that.
(WARNING: In visual mode, you may see how these linedefs with the slope special may show a missing texture / warning sign. Adding textures there may help dispel any slimetrails (in Software) or gaps (in OpenGL). Be careful, though! Should you use Shift+Click and then press A in visual mode to align textures, you may end up messing the texture offsets of these slopes, ruining the entire thing!) Worse, you won’t be able to gauge how messed up it is until you quit visual mode and re-enter again, which may fool you into thinking your slopes are still fine.)
With that warning in mind, you now know how to create basic vertex slopes! But what if you want to go even deeper? We will look at some more things you can try to do.
Adding more linedefs to the floor
Adding more linedefs to the floor
Crossing linedefs
Crossing linedefs
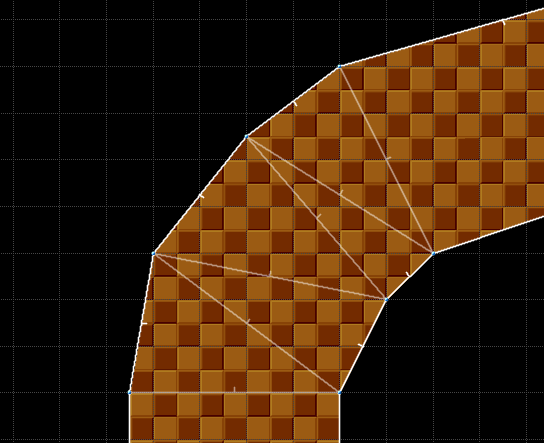
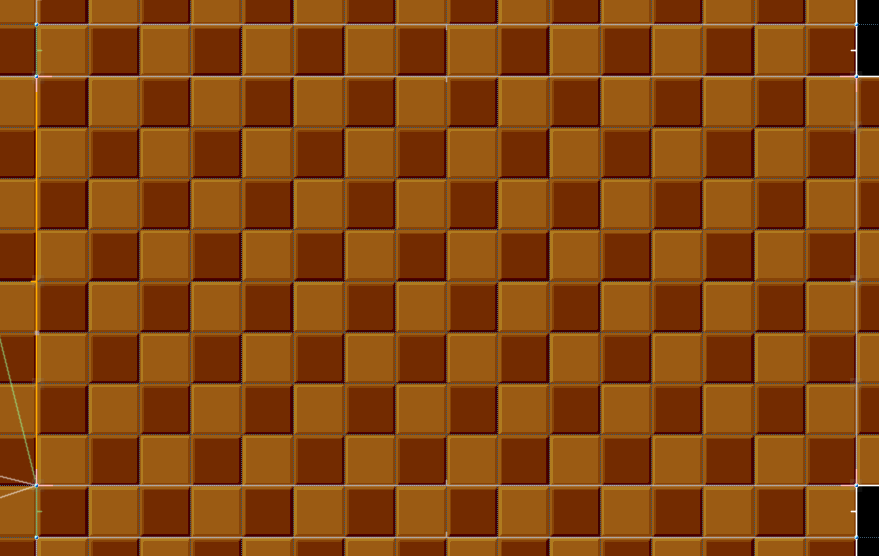
So now we have a pretty zig zag.
It would be a shame if I started drawing lines over it! >:)
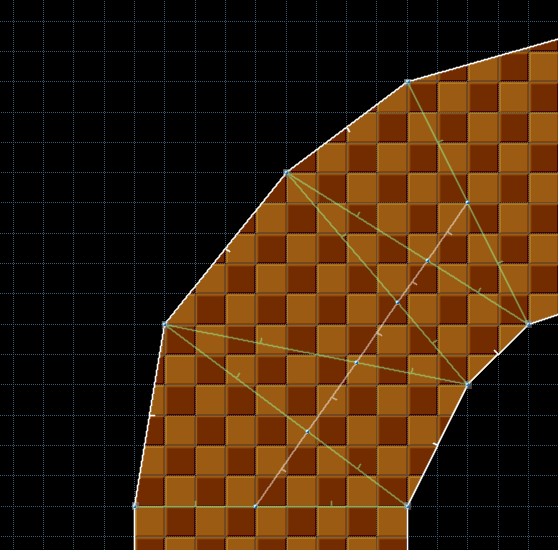
Luckily, nothing happens. Because we already made the slope, the linedef tags remain untouched. Enjoy your sector art, everyone! :D You can add track borders of a different color, leading lines, etc.
Just be careful… Ideally you still want your original “green-marked” lines to try to remain as straight as possible, and similar to how they were originally created, though. Or else, you may cause bigger and bigger microspacing issues.
It would be a shame if I started drawing lines over it! >:)
Luckily, nothing happens. Because we already made the slope, the linedef tags remain untouched. Enjoy your sector art, everyone! :D You can add track borders of a different color, leading lines, etc.
Just be careful… Ideally you still want your original “green-marked” lines to try to remain as straight as possible, and similar to how they were originally created, though. Or else, you may cause bigger and bigger microspacing issues.
The Copy Slope Special
The Copy Slope Special
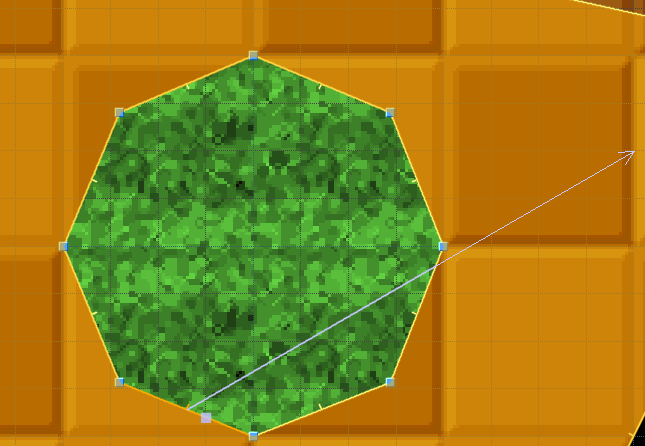
Let’s add more things! We’ll add a smaller circle that could represent a sneaker panel.
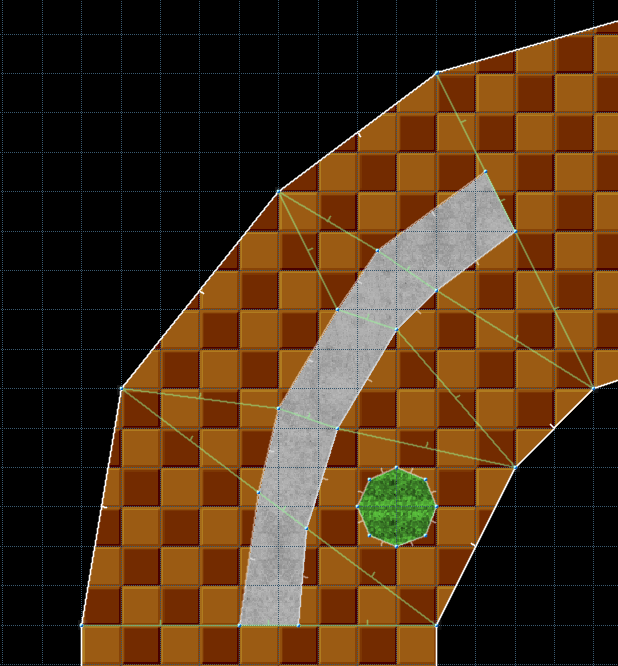
If you create shapes that do not share a front sidedef with whatever linedef has the 704 special, you may cause problems!
Dang it.
The best way to fix this is by using a copied slope. Only the front side is supported by ZB here, so you will have to flip a linedef if necessary (press F to “F”lip).
Tag this linedef (any linedef facing that sector will work) with a new number, in this case, 9. And then, tag this sector also with the number 9. The sector where the linedef is facing will copy the slope of whatever you tag.
You’ll know you did well if an arrow appears:
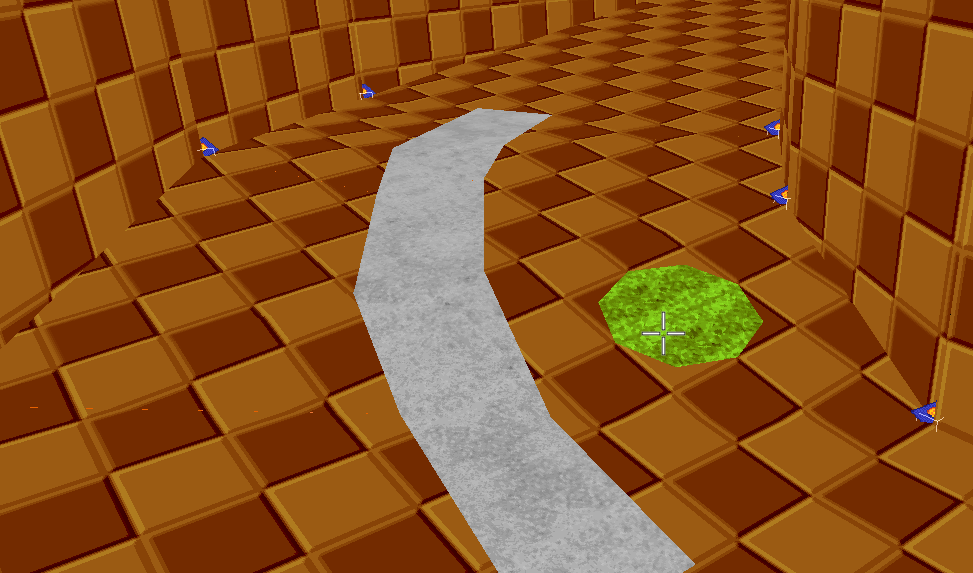
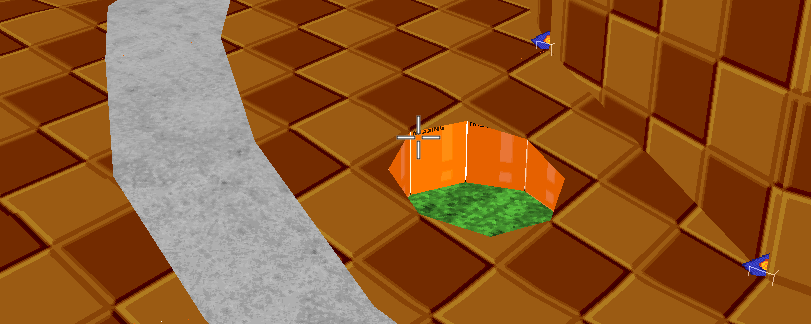
That was close. This is a perfect way to add sneaker panels, offroad, and even FOFs in the middle of slopes!
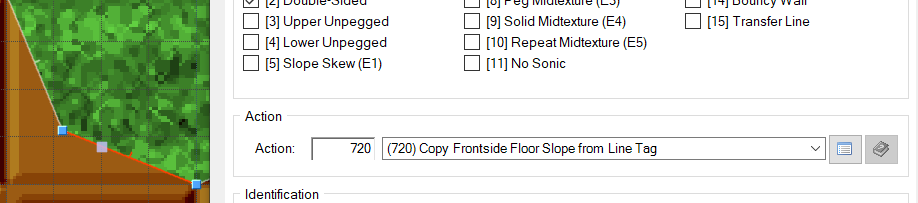
(NOTE: You can also use 704 with the exact same setup instead of 720 for copying. However, 720 is always recommended in case you use a FOF, because trying to align the FOF textures by pressing A could mess with your slope if you are using 704!) (Another note: the linedef with special 720 must not be perpendicular to your slope!)
------------------------------
Sloped FOFs
Sloped FOFs
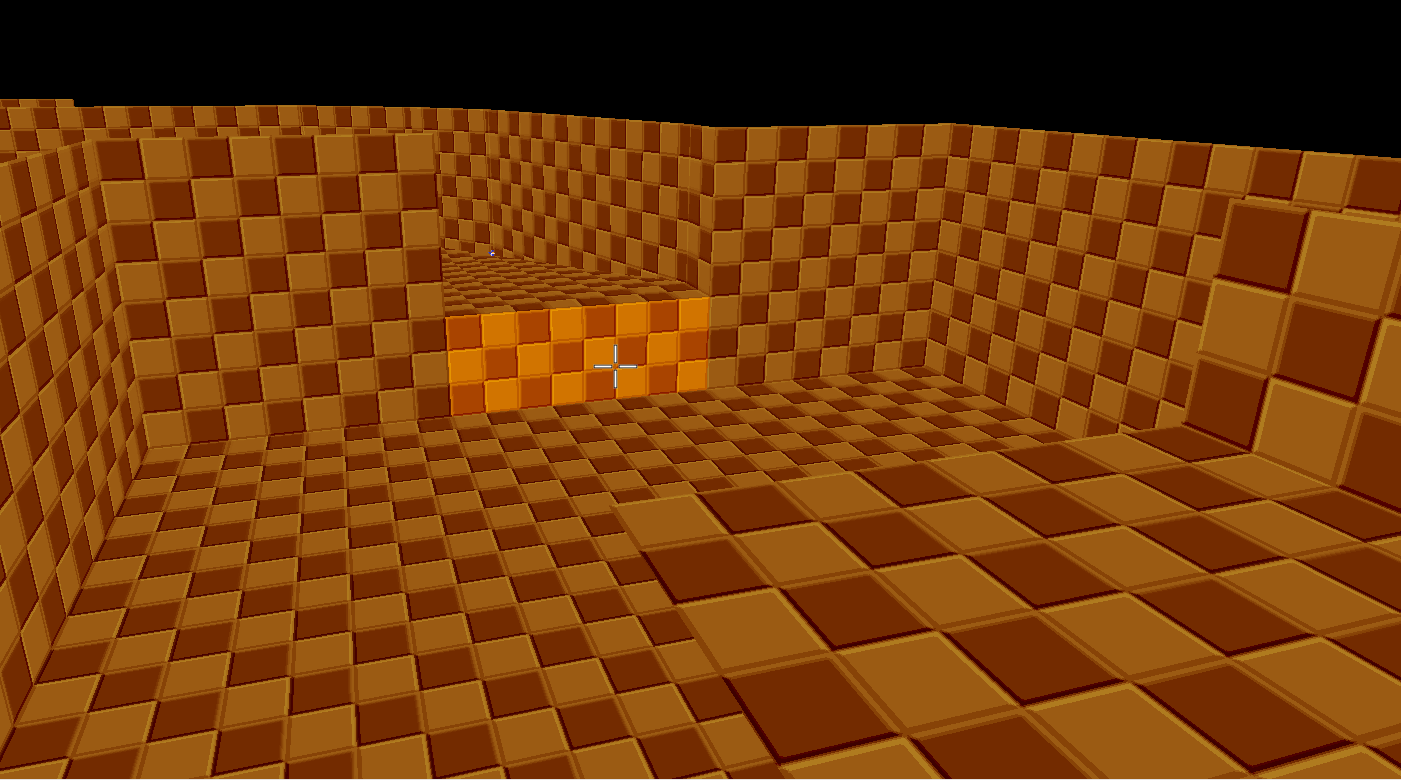
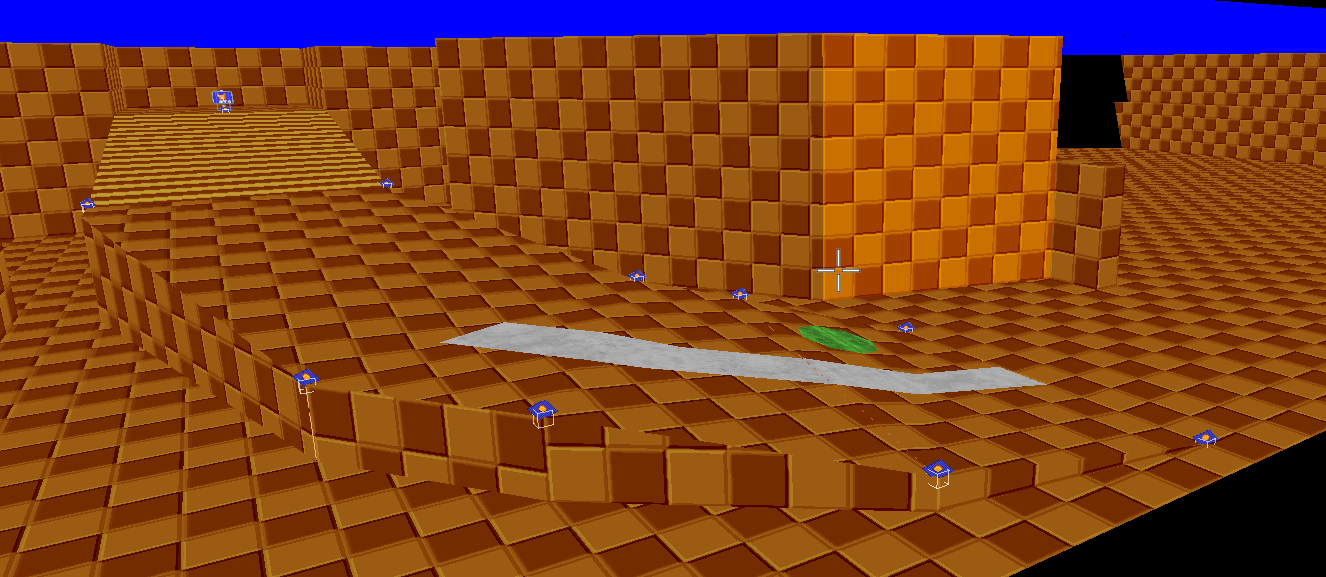
The area has been expanded a little:
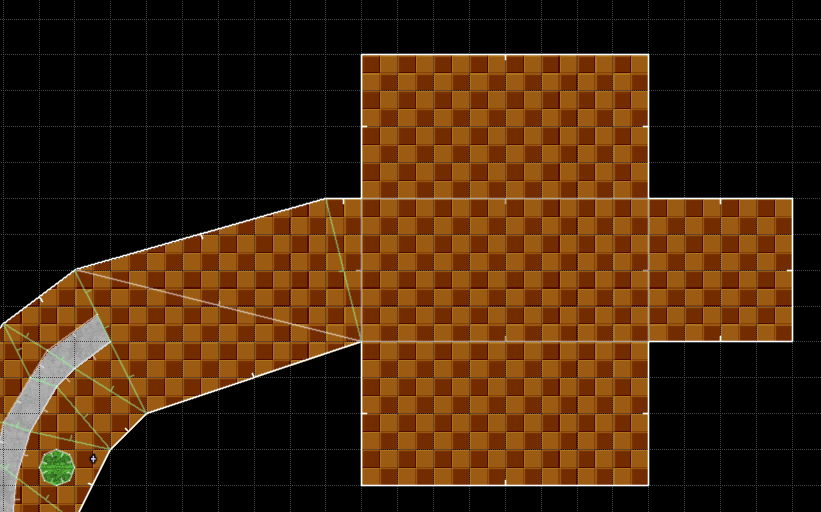
By triangulating that last part, and using Sector Slopes, we have arranged things just a little and made an even higher ramp. Now we want to make a bridge connecting two sides with different height:
To do that, we need a FOF.
(https://wiki.srb2.org/wiki/Zone_Builder_tutorial/Special_effects_and_tagging#Floating_platform). You can already make the FOF without really caring that much about the ceiling or the floor. Whatever their heights are will be entirely irrelevant.
The FOF has been made, but it hasn’t been sloped yet. You could use FOF Sector Slopes for this, as it is a straight and rectangular FOF with parallel linedefs. We are going to use vertices anyway so you can apply the knowledge to any FOF you want. (And remember, with some FOFs it is the only way!)
First we’ll slope the ceiling of the FOF (aka the driveable part). I added three Slope Vertices with Tag 11. They are only put like this, in an isosceles triangle form, because this rectangle is straight, and I can afford to do so. (Remember, we can only use 3 Vertex Things per slope!) If not, you have to triangulate the sectors and do it like before.

Then, go to your control sector and use one of the still free remaining linedefs to set the slope as you would do normally. In this case, because all three Slope Vertices have the same Tag, I use the first method of slopes (just like the slope with Tag 1).
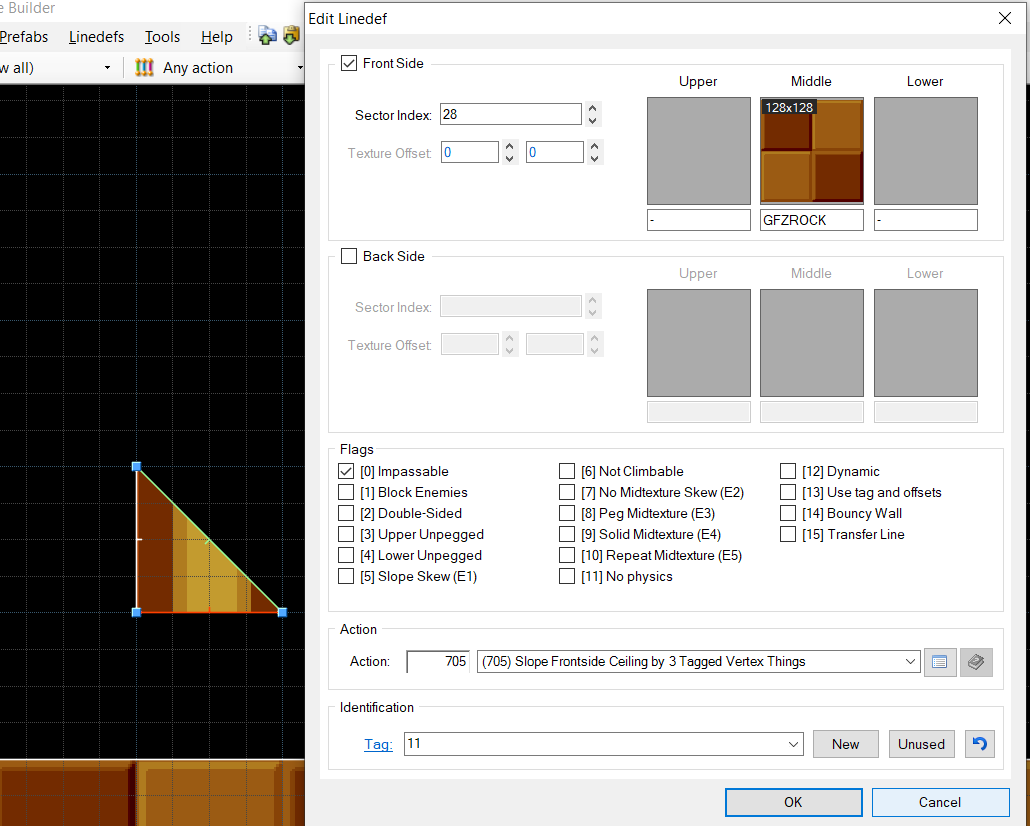
Remember! You use 705 instead of 704 because you are sloping a ceiling! You may need to adjust the Slope Vertices and raise their heights (because they are based on the floor height without the FOF) until you can see any good, unglitched results. But if you adjust it correctly, it will work.
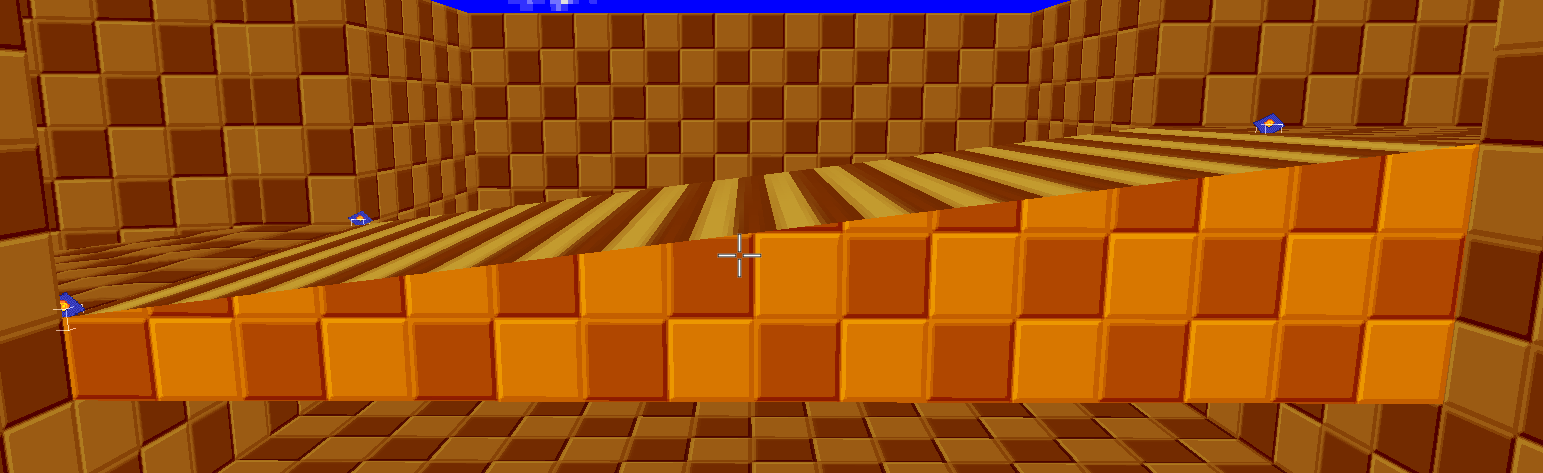
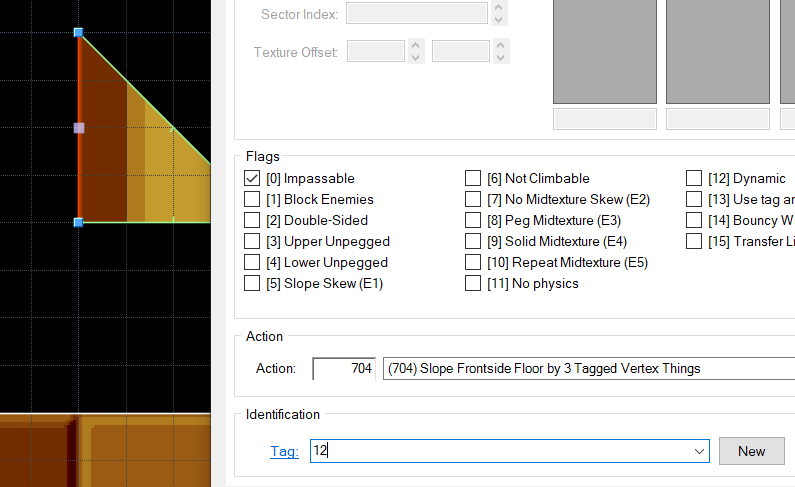
By adding another set of three Slope Vertices (which I tag as 12), you can slope the floor of this bridge the same way. Those Slope Vertices can be in the same place, or similar, at least, so you can click them easier (remember, never right on top of a point or linedef) or you can be creative. Use free remaining linedefs in your control sector for this. Running out of linedefs? Make more, for example, by making your control sector shape with more sides! That way you can combine that with other specials, like flat alignment (Linedef 7).
To fix that nasty texture alignment, tick [3] “Upper Unpegged” on the linedef with the 100 Special (which makes the platform) then tick [5] “Slope Skew” on both control linedefs making the slopes. It will be visible ingame.
:D
-------------------------------
Midtextures (DIFFICULT)
Midtextures (DIFFICULT)
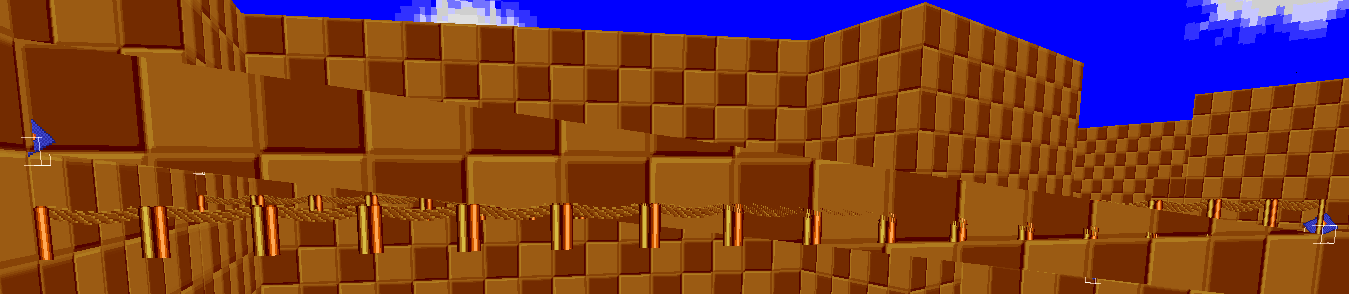
I’ve made some room to show how midtextures work on Vertex Slopes. These are useful for decoration and for walls and fences (Solid Midtexture).
They work just fine ingame (Using Lower Unpegged or Peg Midtexture, depending on how you want the textures to appear). Sometimes, it looks like they can glitch out in ZB, but they don’t - that said, always check in-game!
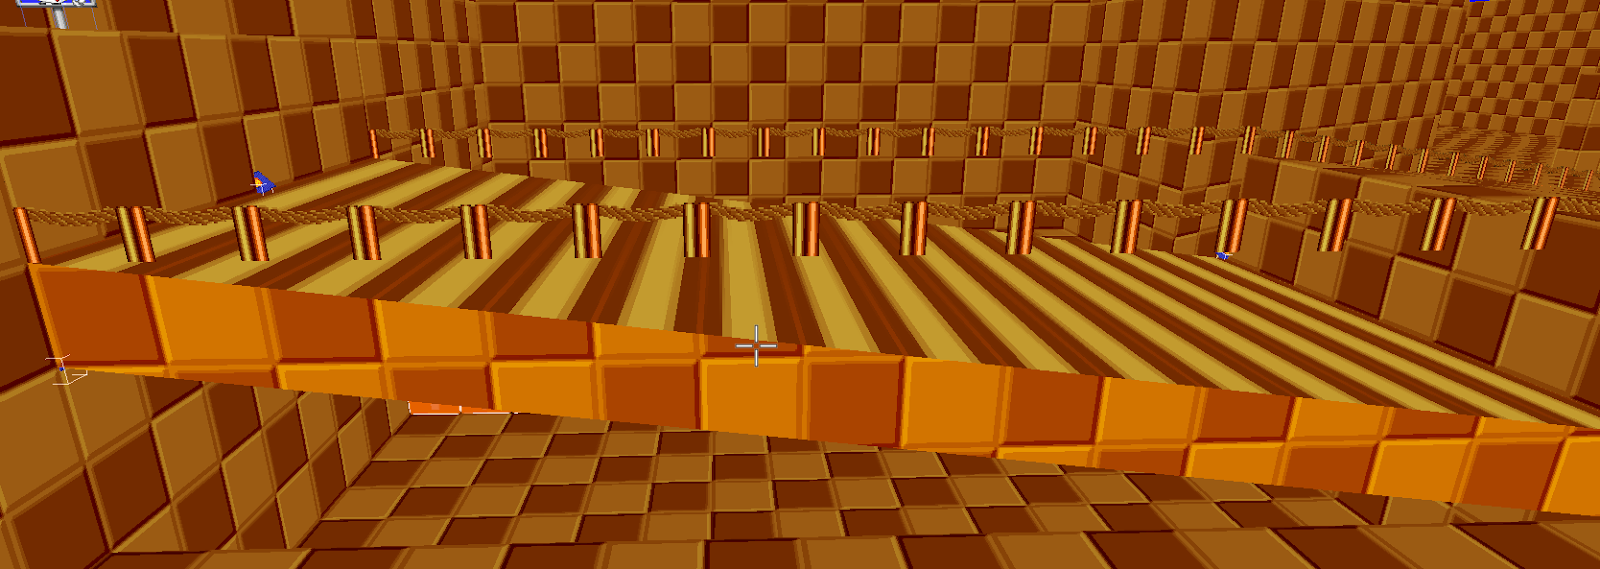
What happens when we try to midtexture a sloped FOF?
The midtexture doesn’t follow the slope, because the floor beneath the FOF is flat. What we have to do (and massive shoutouts to Eldog for teaching me this, by the way!) is the following:
- Slope the ground under the FOF, at the same angle as the FOF itself (use sector slopes or vertex slopes for this, but you gotta do it. If you have to slope it “under the ground”, then lower the ground altogether.)
- Add a solid midtexture to those sloped linedefs, and raise them until they line up with the FOF.
- Cover that hole you made with another FOF, a solid one. (This step is optional if there’s not going to be anything under the FOF or it blends nicely enough.)
Step 1 is usually the hardest. Just trying to lower the floor to make room for a slope already gives you this headache…
Because if you lower the floor, you also lower the Slope Vertices! So be careful.
After fixing that height problem...
I use another vertex slope, just like before, but on the ground itself (using Tag 13 in my case)
We still do have a problem, though. Lower unpegged textures will stick to the HIGHEST FLOOR SURFACE, and in this case, that surface is STILL the straight floor from the outside sectors bordering our bridge. As such, the sloped ground underneath the bridge MUST BE WIDER THAN THE BRIDGE ITSELF.
Because of that, I’ve made the lowered ground wider. You can use the same special, or you can use the Copy Slope Special from before. Alternatively, you can make it so that your sloped sector is the highest floor in your surroundings, which means you can also lower the floor height of all surrounding sectors. Be smart with your geometry - you can also create very thin sectors and lower their floor - they will almost blend perfectly.
We’ll continue with the first method (Expanding the sloped ground).
The highlighted yellow uses 714! Because it is sloping what’s on the BACK of that linedef. The smaller green linedefs use 704.
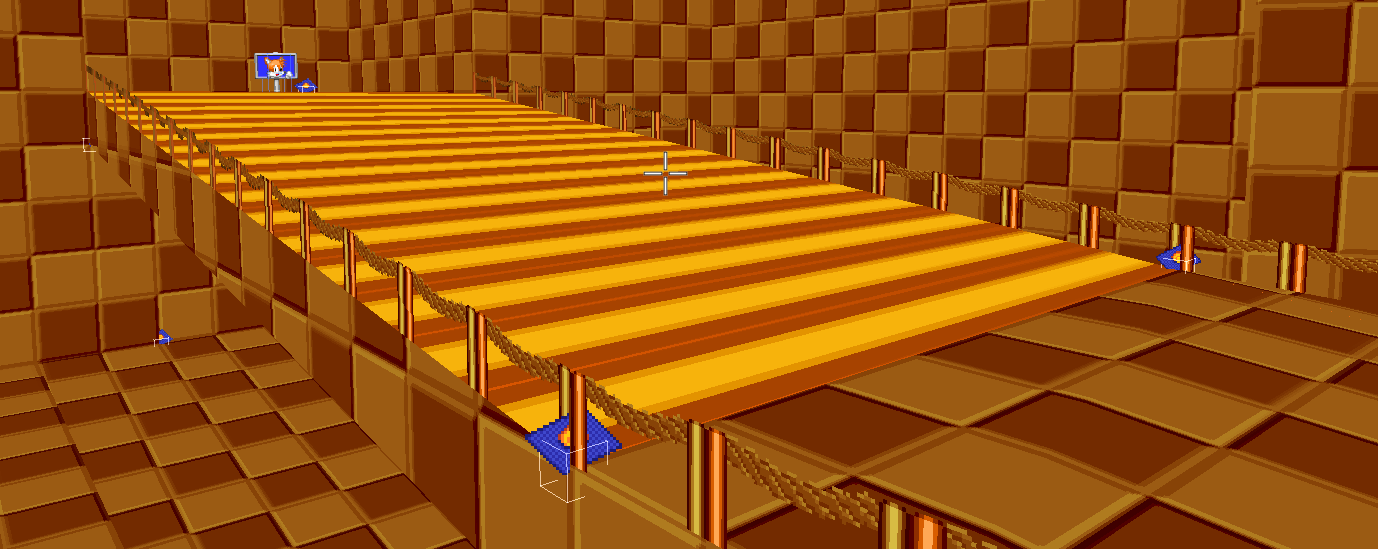
Almost there. The bridge is now perfectly usable, but below it, the floor is now sloped. If you want to also make what’s below look normal, you’ll have to cover it.
Time to cover the ground below with a FOF. Use a different control sector, and with one linedef, use Tag 10 (same as the bridge, cause it’s the same sector) to cover the ground with flat ground), and with another linedef, use a new Tag (for example, 14), to cover the extended ground below the bridge.
Remember to modify this new FOF so that its ceiling is just as high as the ground level (In my case, the heights are 0) and so you can disguise it well, and even drive through it without any problems.
Let’s see how it goes in game.
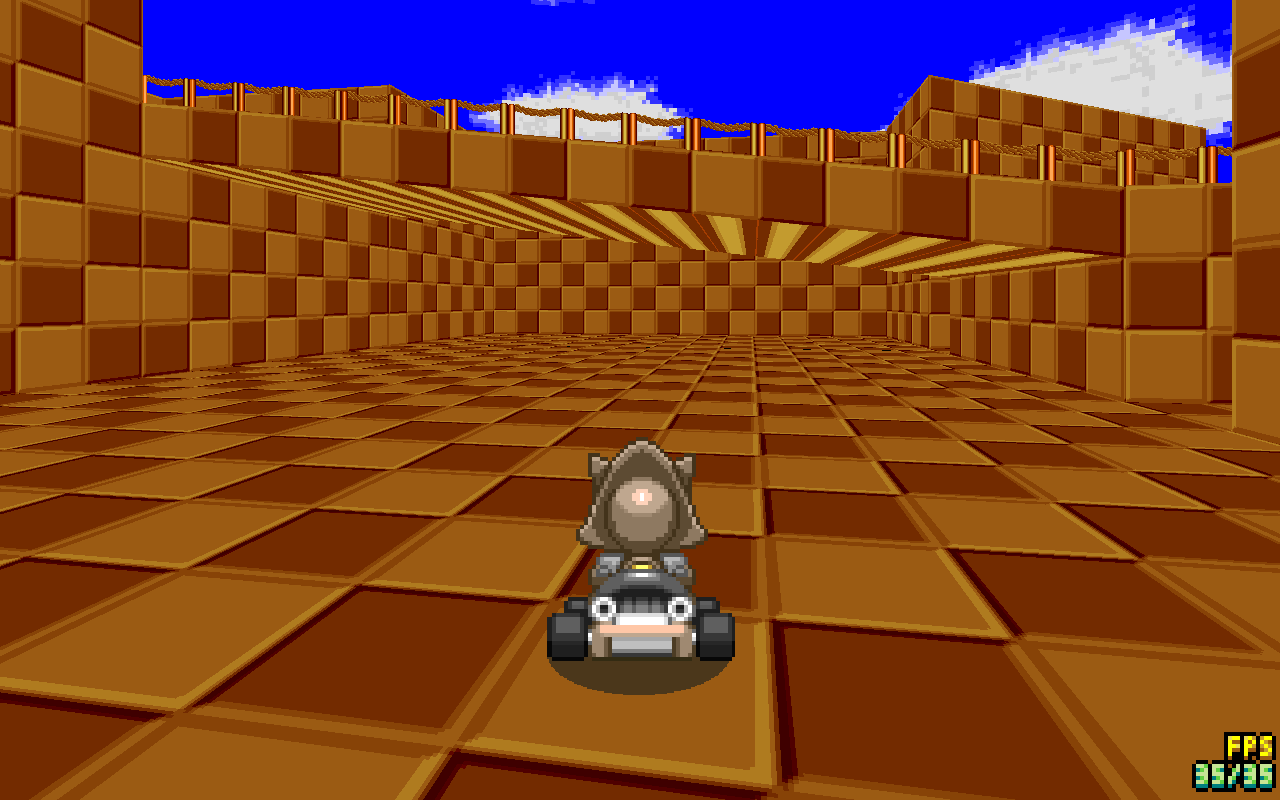
That was complicated!
-------------------------------
This was a shorter version of the full guide, whose link is provided in the additional information. It has general tips, including how to combine sector slopes and VSlopes, as well as how to add midtextures from the ceiling and using the new Vertex Slope Assistant.
Still, now you should know how to do vertex slopes with expertise!
I hope this guide was helpful to you all. Have a nice day, and make sure to provide feedback!
---

