- What permissions do you give others to modify and/or maintain your submission?
- Modify: ASK ME - Maintain: NO - Others must ask me for permission before modifying my submission or use it in their own work, and I reserve the right to say no for any reason. No, others may not maintain my submission, even in my absence.
Hey kids
So, it looks like you finished your shiny new map. But it’s missing a few elements.
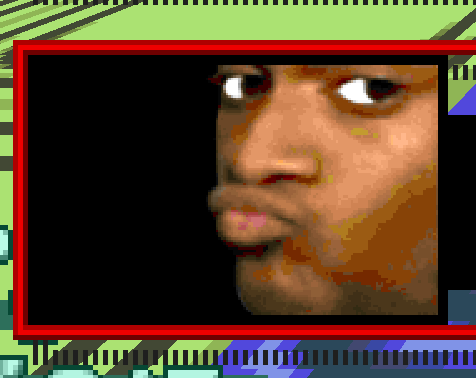
Namely, the minimap is missing, and your level shows up in the level select like this:
Fortunately, there are easy fixes for this: This doc will teach you how to make the final touches needed for your map to be passed into Addons & More, plus a little bit extra for more adventurous players.
MINIMAP PT 1: SET UP
Let’s start with the Minimap.
Start off by highlighting the playable boundaries of your stage. (i.e. just the road)

Then go into Edit Selection mode
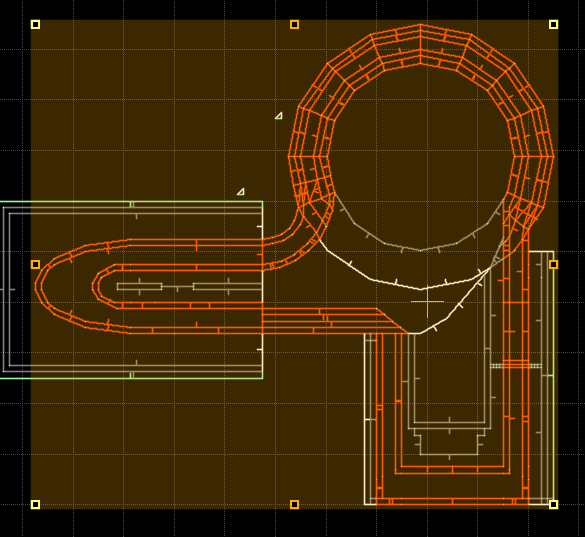
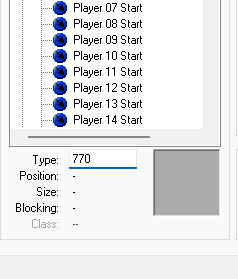
We are going to place two of Thing Type 770, Minimap Marker on opposite corners of this selection. So, let’s place two of em’ on the top left and bottom right corners.
(As of this writing, the RR config doesn’t support every invisible thing in the game, so just type 770 in this box right here)
Once you’ve got both things placed down, save your map and go test it.
Once in-game, open the console, type minigen and hit enter.
This will generate a minimap for you and put it in your RR folder.

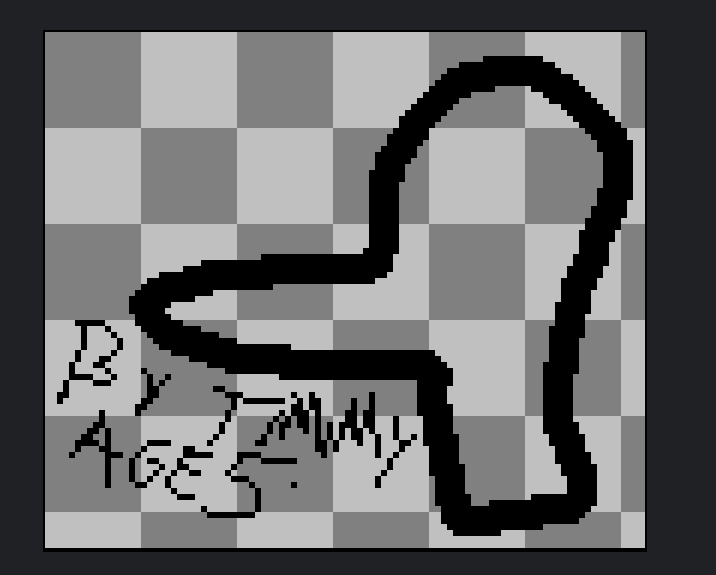
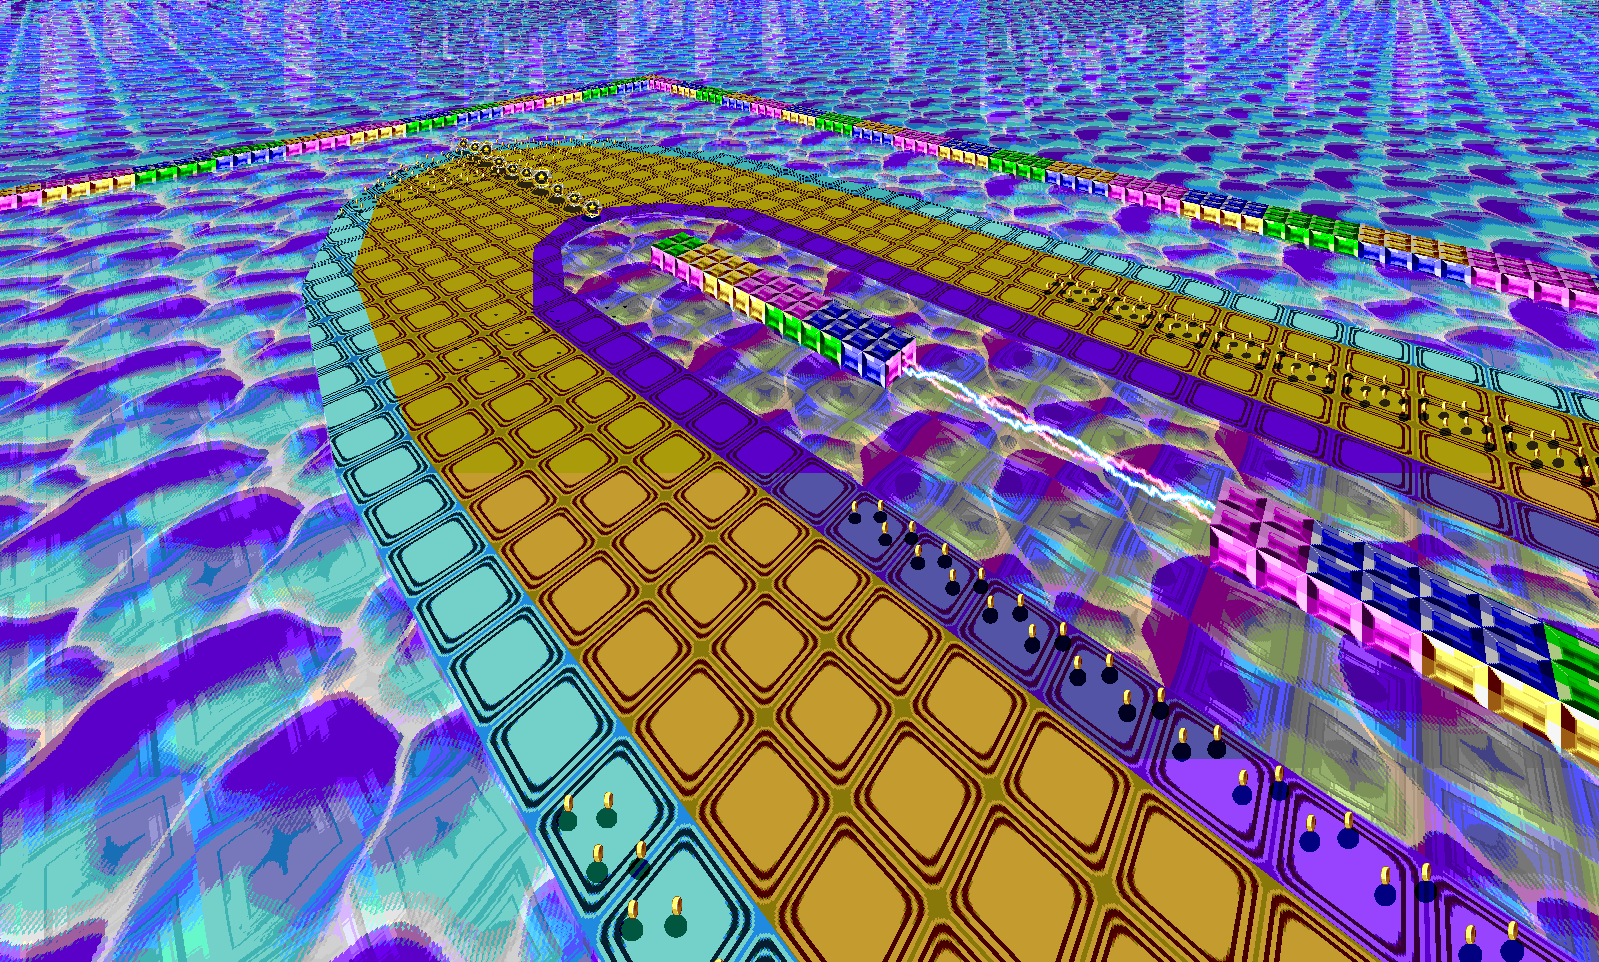
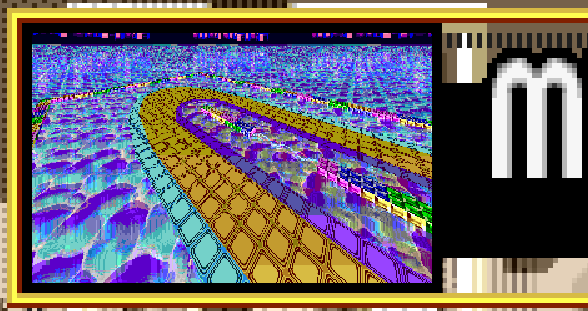
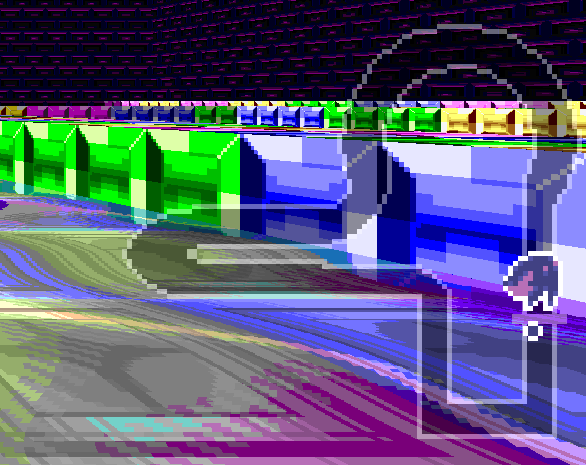
So, we’re done right? Let’s check out what the game genera–
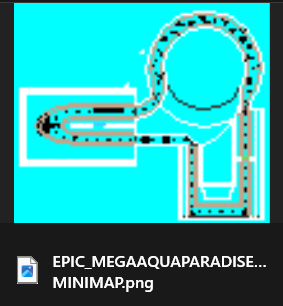
oh
Yeah, we obviously can’t use this as the actual minimap for our level. We gotta edit it first.
MINIMAP PT 2: TOUCH UPS
Let’s open this travesty up in your favorite image editor and start touching it up.
Notice: Everything below is completely optional. The minimap is just a simple image that the game loads into the HUD. So, it can be styled however you want. Even if it's completely stupid, it’ll still work as a minimap.
But if you want to stick close to the style that RR employs, then continue reading.
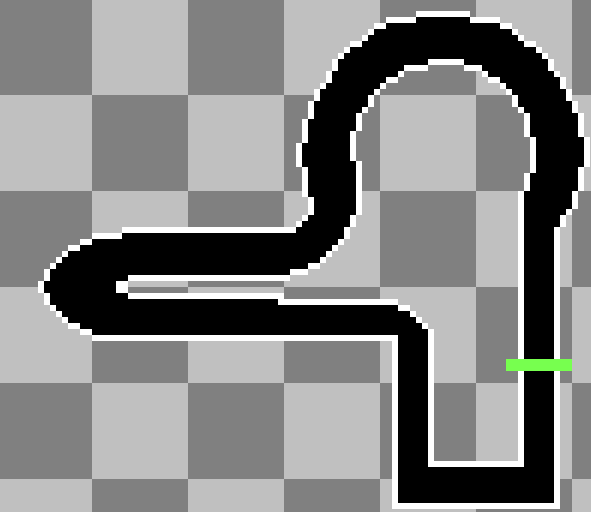
So let’s start making it beautiful
So anyways, RR’s minimaps are black with white outlines.
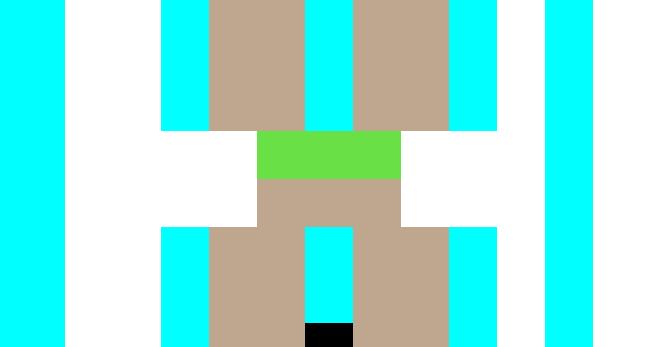
As for styling the white outlines, for smooth curves you want to avoid doubles.
Doubles are where more than one pixel shares a column or row when they curve.
They’re hard to explain so here’s an example:
Basically, curved outlines should be nice and thin, and not thick and ugly.
Meanwhile, hard (typically 90 degree) corners should be thick and sharp, and not curved.
Once you’re done with outlining, you should be finished, riiiiiiiiiight?

WRONG
We still need to mark the finish line. So players know how far they are away from finishing or lapping.
The finish line is marked via a green pixel on the generated minimap
All we need to do is to take this exact green and put it on our minimap.
The finish line is marked via a 2px thick line that goes across the track, like so.
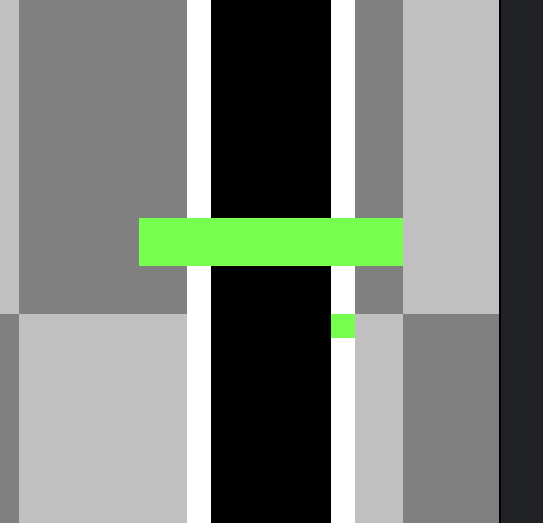
It should go a little bit over each outline so that it's clearly visible at all times. Even in the chaos of a 16p match.
And with that, we’re done with the minimap. But, before we import, there’s another thing we need in order to make your stage able to be accepted.
TAKING THE LEVEL PICTURE
Now, we gotta take the picture that will show up on the level select.
Start by saving and booting up the game.
Let’s start an offline server with your map.
Once you’ve loaded up the map, let’s go into the pause menu and hit Spectate.
Now, you can freely move the camera about the stage and even noclip through it!
Go to the particular spot you want to capture
Press F3 to hide the HUD.
Type cheats 1 in console, and enter the cheats menu in the pause screen.
Once inside, set drawpickups to No.

We’re not done yet! Now, head into Options > Video Options, and set your resolution to the lowest it can go(which is 320x200).
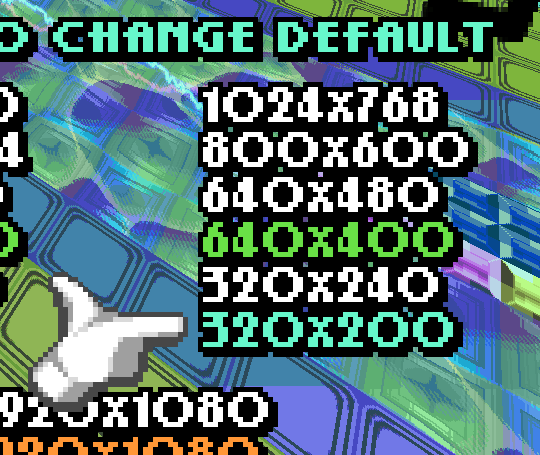
Now take the picture by pressing F8.
You’re done! The picture will show up in (RR folder)\media\screenshots.
PUTTING IT ALL TOGETHER
Now it’s time to apply both elements to your level.
First, import your level WAD into your resource PK3, creating a complete map mod in the process.

Once imported, double click it in order to open the WAD itself within the PK3.
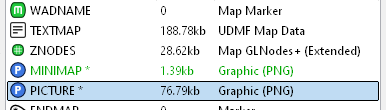
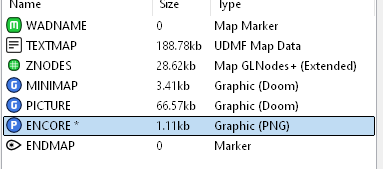
Now let’s drag both our minimap and level select pic into said WAD file.
Make sure it’s placed above ENDMAP but below WADNAME.
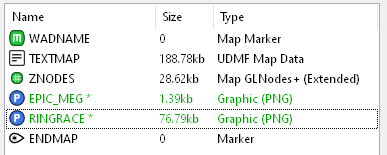
We’re gonna rename our minimap to MINIMAP and our level select pic to PICTURE
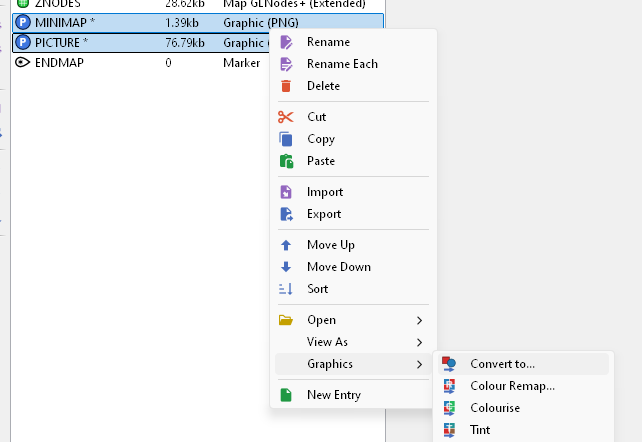
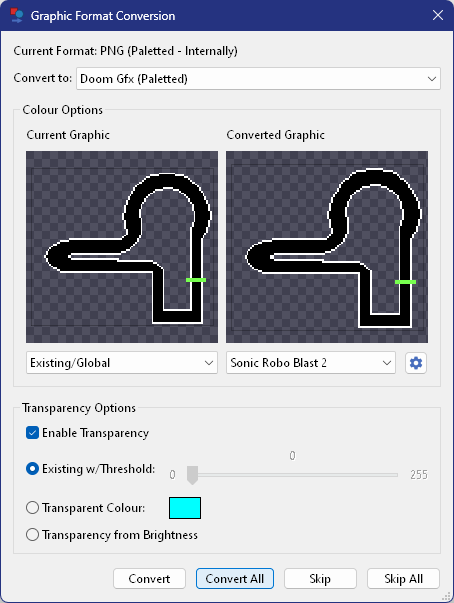
Now let’s convert em’ to Doom Graphics
Save both your WAD and your PK3, and boot up the game.
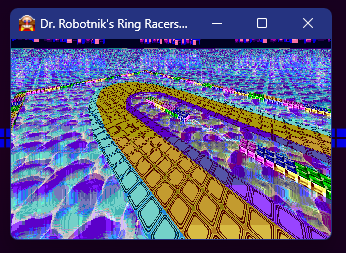
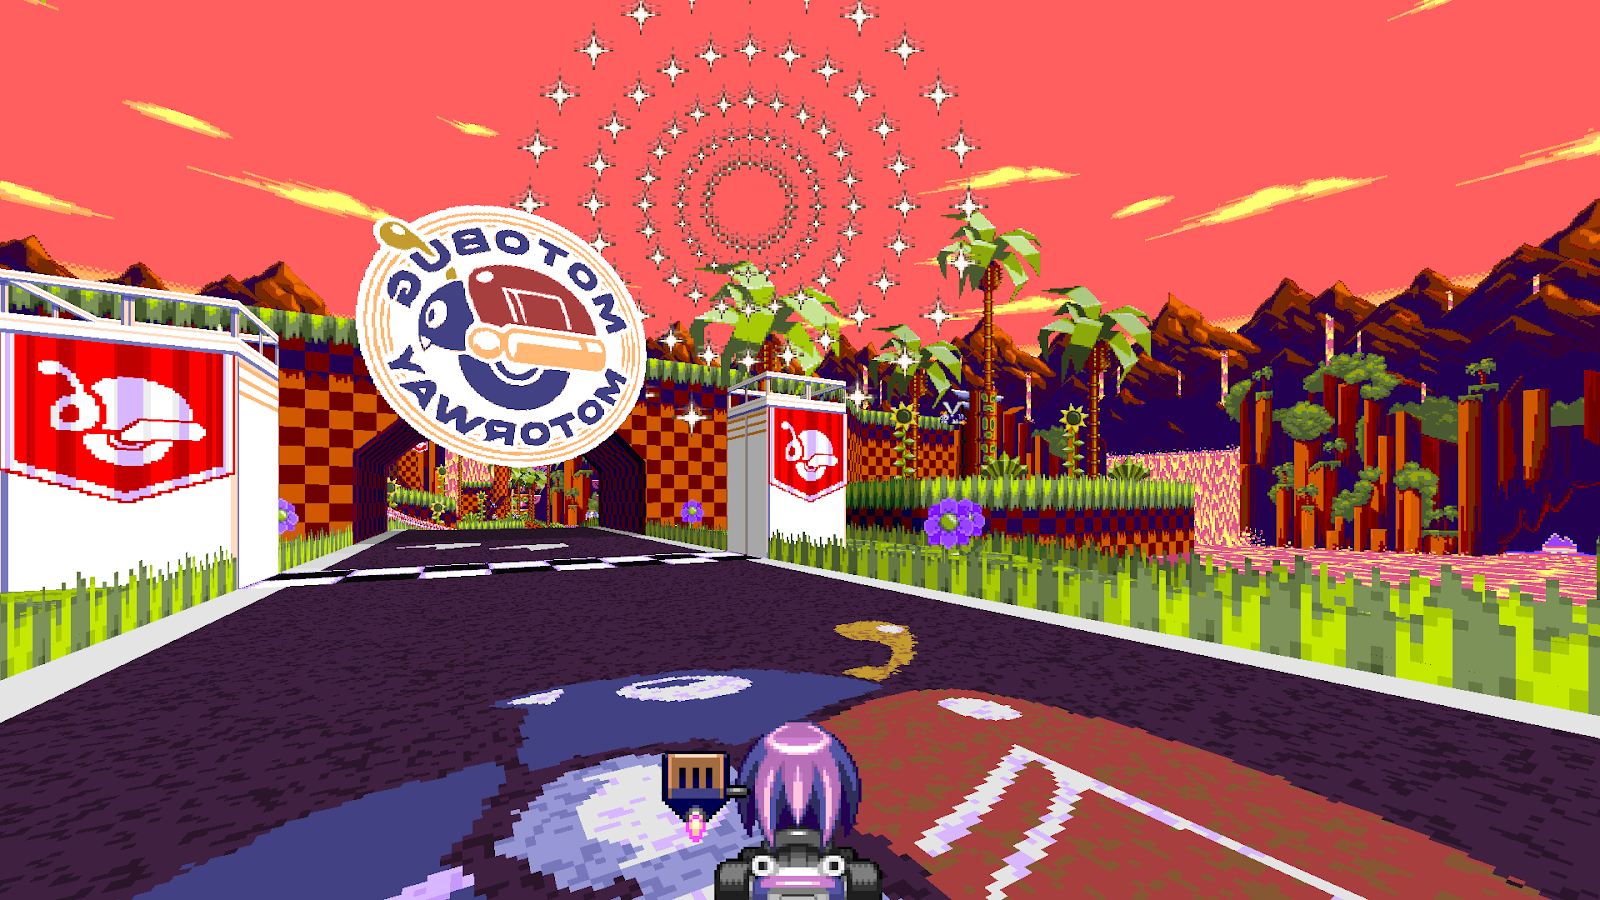
If you’ve followed everything correctly, then both elements should appear just fine.
If they all show up correctly like up above, then congration your did it.
You have everything you need in order to submit it to Addons & More.
That’s it, right? Nothing else left to do?
Well, there is one thing.
ENCORE MODE
What is Encore Mode?
Unlocked by unlocking every map in the game,
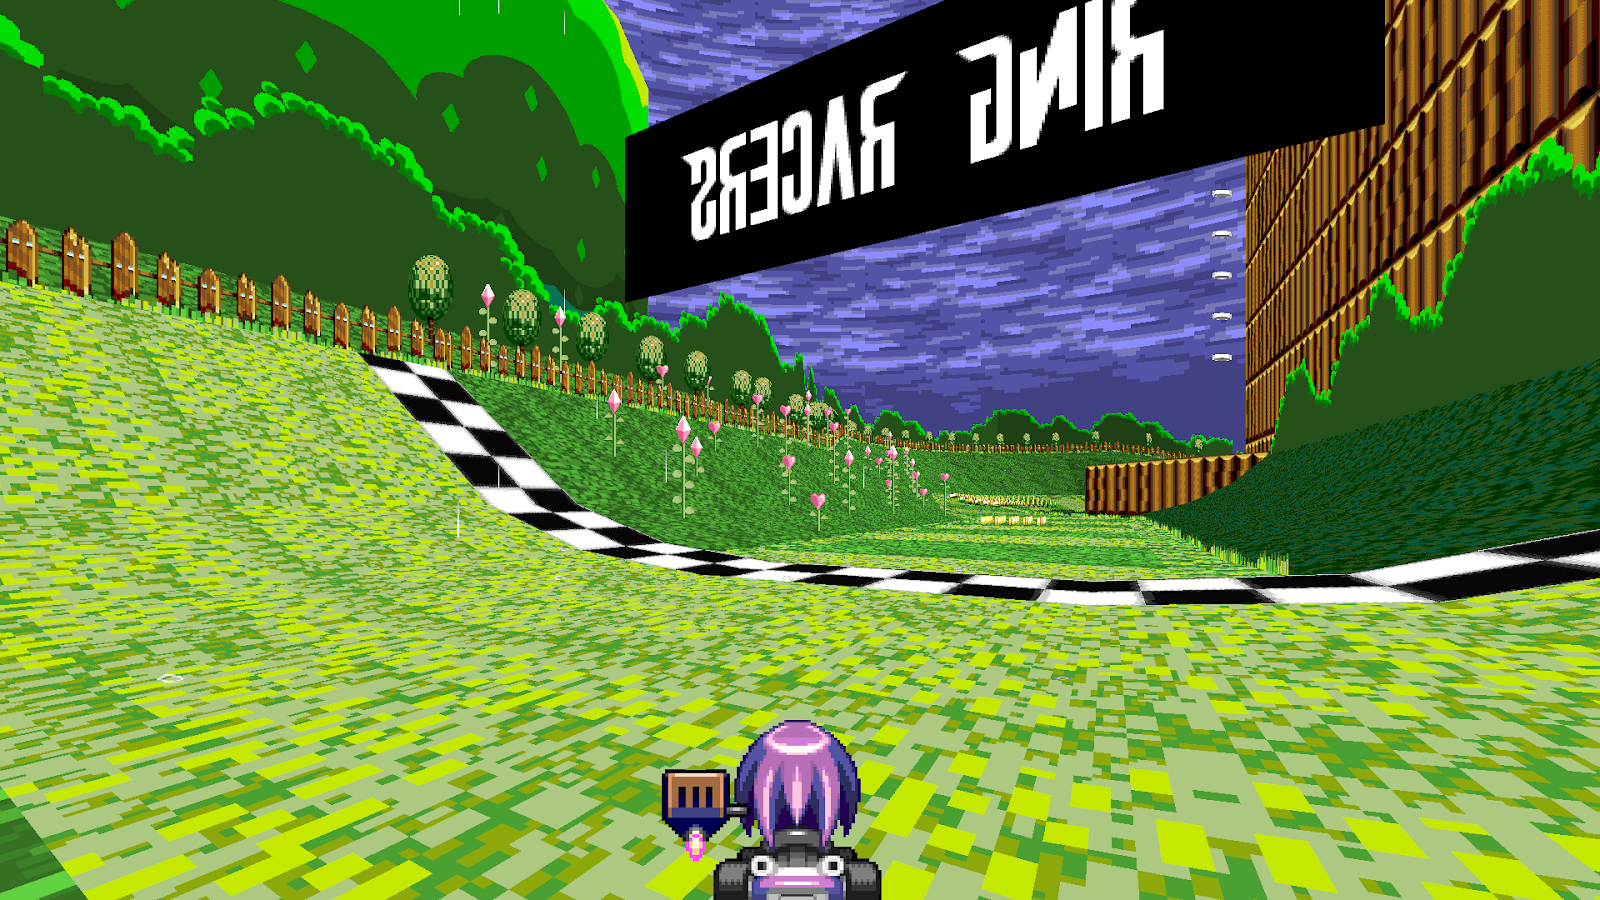
It’s basically a fancy Mirror Mode. All of the stages are flipped horizontally, and have a fancy new palette attached to it, much like Mania’s Encore Mode.
All of the base game maps have alternative Encore palettes.
Keep in mind, Including an Encore Palette with your map is completely optional.
It’s not a requirement in order to get your map into releases, and the game doesn’t crash if you boot up Encore mode without one, although….
Booting up a map in Encore mode without a palette will still flip the stage, but there will be no alternative palette, it will just look the same as it usually does. So if you want to include one, then keep reading…
SETTING UP ENCORE REMAPS
In order to have an alternative palette, we need to make an Encore Map.
An encore map is basically a miniature version of the game’s palette with all Encore paletteswaps applied. Here’s Motobug Motorway’s Encore Palette.
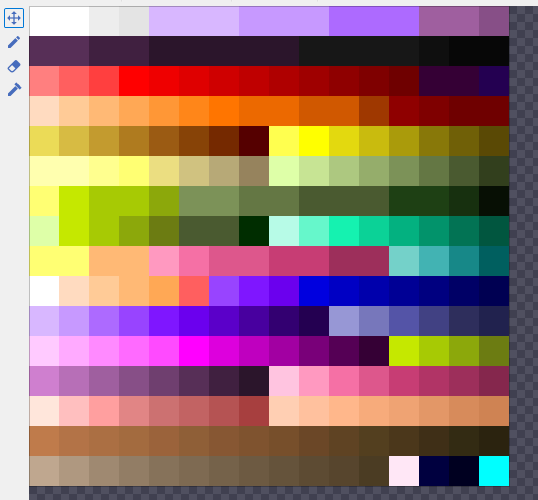
We’ll need an untouched version of this file in order to use it.
Good thing I have it right here! Go on, you can keep it~

Once you have that tiny thing downloaded, you’re now ready to do some paletteswapping.
There are two methods you can use to paletteswap. The first is before importation, and the second is afterwards. Let’s cover the first one.
ENCORE VIA IMAGE EDITOR
That’s right, the first method is to swap colors using your favorite image editor!
Nothing much to say here other than, go do it.
The only thing you need to keep in mind is that the colors you swap it to must be within the game’s palette. You can’t just use any blurple, you can only use the ones that are already within the palette.
Once you’re done swapping palettes, all you gotta do is import it into your map WAD and rename it “ENCORE”, similar to your minimaps and levelpics.
When converting it tho, instead of converting it to Doom Graphics, convert it to Doom Flat.
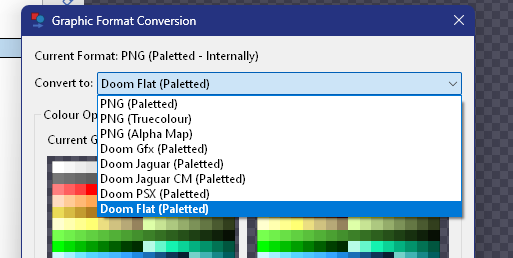
Important step, or else it won’t work.
After converting it, simply save, go into the game, etc. etc.
If your palette has indeed been swapped when entering Encore Mode, then success! Your map is now Encore compatible.
Now for the other method.
ENCORE VIA SLADE
In order to edit your encore maps via slade, you need to have your encore map imported and converted first. This will probably save you headaches down the line.
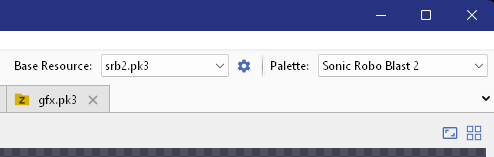
Also, your default palette up here must be set to SRB2 or else it will use the wrong palette for paletteswapping.
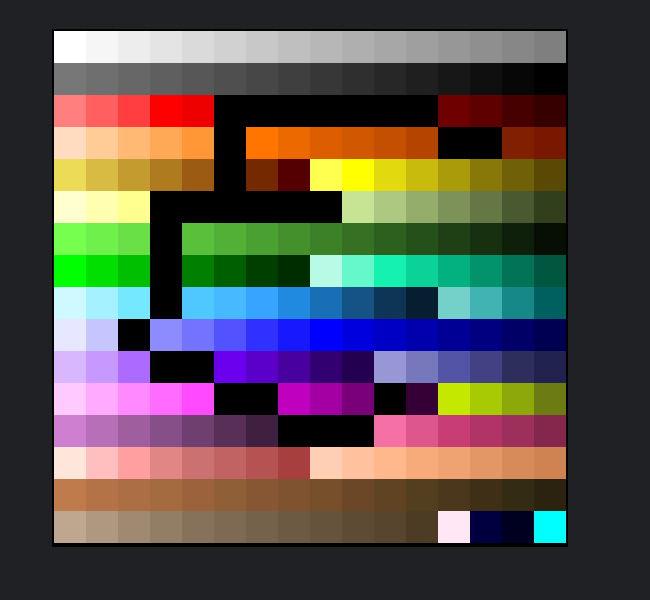
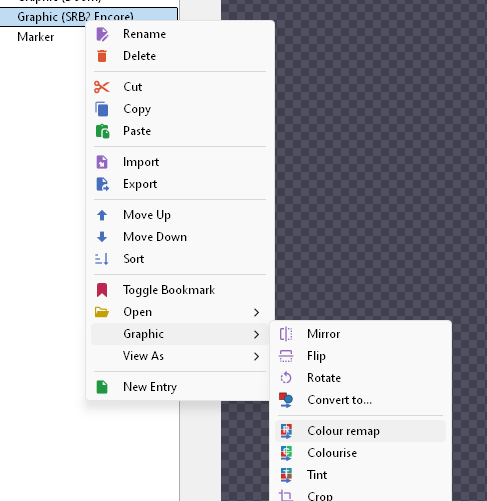
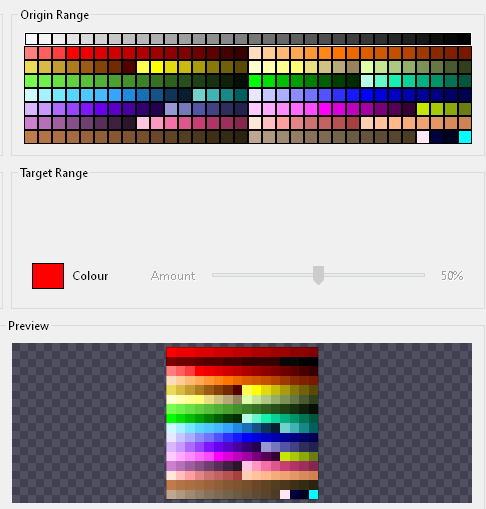
Once you got that taken care of, right click your encore map and navigate down to Graphic > Colour Remap
Behold the Colour Remap window. It’ll let ya easily paletteswap colors without needing an image editor.
Top Palette is what colors you want to swap.
Bottom Palette is what colors you want to swap it to.
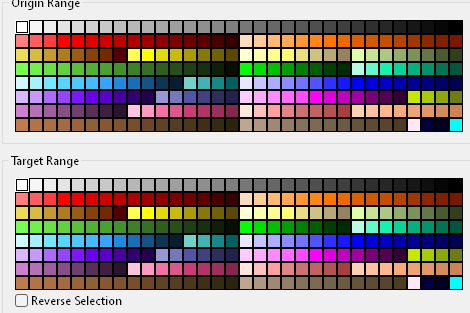
You can do this with either single colors, or entire ranges.
In this example I highlighted all the whites and turned it into reds
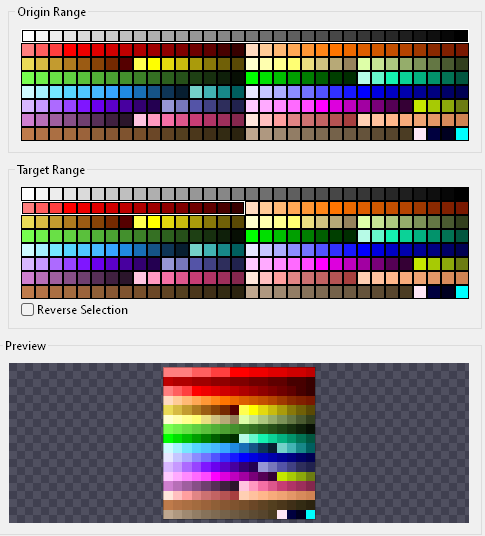
You can only highlight one range or color at a time. So if you want to affect multiple parts of the palette, then just press the plus button right here to add a range.

Or the minus button to get rid of a range.
Up and Down moves range priority up and down. Nothing you need to worry about tbh.
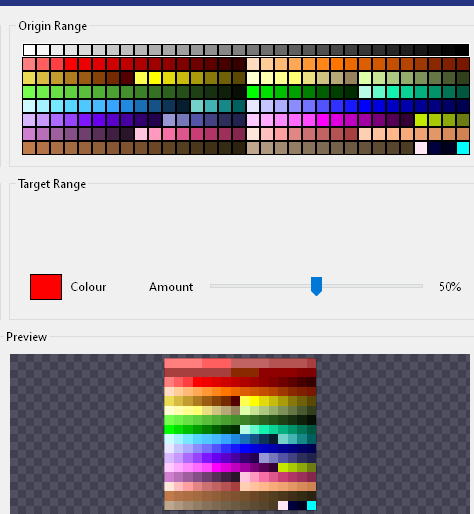
You can do more than just replace colors or ranges.
Try switching to other modes with this section.

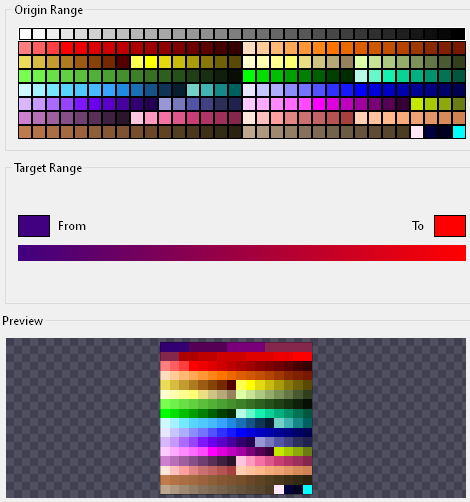
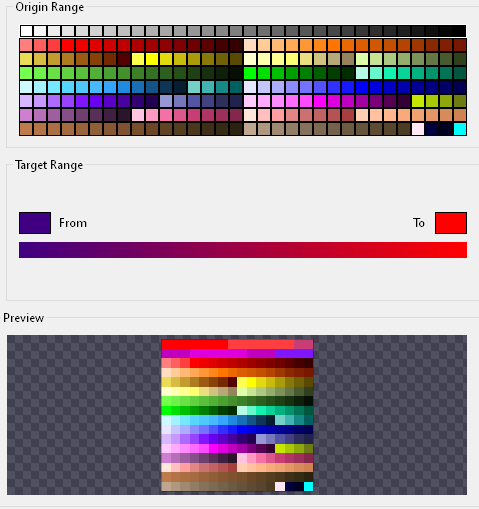
Colour Gradient allows you to turn a range into a specific color gradient.
In this example, I turned the whites into a Violet and Red gradient.
Desaturated Color Gradient does the same, except it’s less saturated
I think anyways
Colourise Range allows you to color a range a specific color
And Tint Range allows you to Tint a range by a specific color
Lotta flexibility here. Perfect for Encore remaps.
Anyways, once you’re done fiddling with the colors, hit OK, save your map, test it etc. etc.
ENCORE REMAP TIPS
Time for some tips n tricks, ok so basically
- Only focus on colors you know will appear in the stage.
With so many textures and colormaps at your disposal, it can be tricky to pinpoint what colors your map is currently using. Better take some screenshots you can quickly reference/edit.
- Stick to a theme
Where are you? What kind of thing will be different compared to the main stage? Different time of day? Different season? Different water chemicals? Find a theme for your encore remap and stick to it.
- Use good colors
I don’t think I need to tell you to Hue Shift, or avoid too much or too little Contrast, or make sure your road is visible. But that goes beyond the scope of this guide. So, here’s some tutorials and other useful info instead.
- Show off progress, gather feedback
You’re probably already doing this by making a map, but showing off Encore progress too can give you some good insight as to whether or not the colors you picked were good or eye-searing.
- Learn from failures and mistakes
Your first encore palette is not going to be a magnum opus. It may not even be that great, but learning from mistakes and travesties will always make you better at making these things. After all, take a look at Kart v1’s palettes!
BIGGER ENCORE EDITS?
You know that Encore remaps aren’t the only thing you can do with Encore mode.
Some basegame maps change the sky and/or weather
Maybe you can change the music too?!?!?
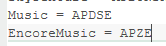
With ACS, anything is possible. Just make sure you wrap everything in an EncoreMode conditional for any code that runs in Encore Mode.
